
December 1, 2017
A tiny reprieve in the weather has allowed me to get one more firing in before the deep-freeze of winter sets in. I thought I’d let you tag along for a firing and peek over my shoulder to get a glimpse of the glamorous life of an artist.
I glaze all my pots at the studio in town and wrap them carefully for the two mile drive out to the kiln. Loading the kiln is not a job I particularly enjoy, so I prefer to chip away at it gradually, working afternoons for three or for days until it’s done. On this particular day, the windchill was a little less than comfortable, hence the frozen and distraught face:
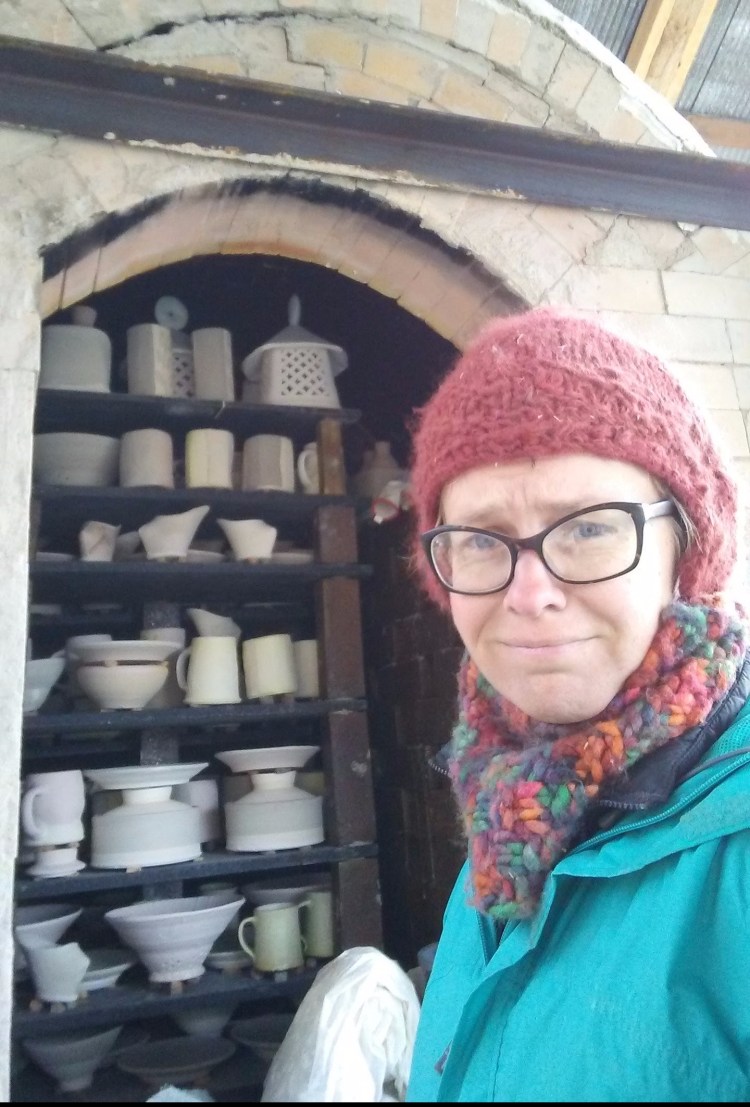
Once the kiln is loaded, I brick up the opening with two layers of brick, on the interior a dense firebrick and on the exterior a layer of insulating brick. Usually I slop over the bricked-up door a liquid mixture of sand and clay to block up any cracks, but this time I forgot, probably because of cold fingers.

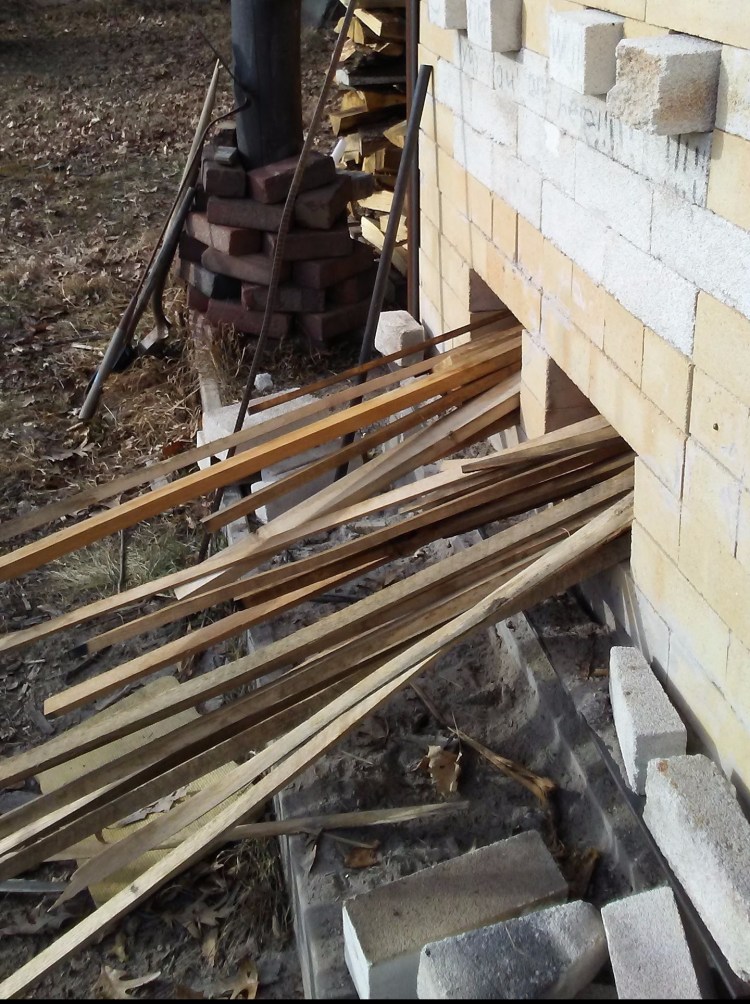
On the picture above, you can see the two arches that cover the kiln. The large one in the center covers the ware chamber, where the pots are. On the left is the firebox, or bourry box, where the fire will be. In a bourry box kiln like this, we stoke the wood in the firebox, and the flame from the wood snakes through an impossibly long journey: from the grate in the firebox it burns downwards toward an arch-covered inlet between the firebox and the ware chamber, is directed upward to the top of the arch in the ware chamber, filters down through the pots, through the flue at the bottom of the ware chamber, and up the chimney (on right). Yes. It’s a long trip, but as you’ll see the wood flame is a long flame and is always up for the journey.
(Note: Now I’m going to document the log of a typical firing, and you might find it a little, well, boring. Slightly technical. It’s ok. You can scroll through and enjoy the pictures and still get credit for reading the entire thing. I’m including this mostly for the benefit of other wood-firing potters, or those who want to be. Who knows, that could be you!)
The firing begins the evening before, when I start a little fire on the floor of the firebox. I feed it with bits of pine for about 15 minutes, then drop in several armloads of chunks of hardwood and close up the hearth door and the chimney damper to allow it to burn slowly overnight.
By the next morning, even if it’s not still burning, the smoldering fire has taken the chill off the bricks and will allow the temperature to rise quickly.
6:00 am: 200 degrees. Fire is relit on the floor of the firebox.
8:30: 915 degrees. Feeding stove-wood on the firebox floor. Jamming in as much as I can–this is tricky because the hearth openings are pretty small.

10:00: 1114 degrees. Starting to feed in long hardwood sticks on one side of the hearth door. These can rocket up the temperature quickly so I start small.

11:00: 1223 degrees. Feeding in the sticks on both sides. They burn so fast that pushing them in is a nearly constant job. You sit between the piles and push in the sticks on your left, push in the sticks on your right, rub your nose and sigh a little, and then the sticks on the left need to be pushed in again. It’s a bit demanding, but the wood is free scrap from a millwork place nearby, and I’d prefer this to hours with a chainsaw cutting our own. And they work mighty fine for raising the temperature quickly.
11:39: 1400 degrees. At this point the coal bed on the floor of the firebox is high enough that it can sustain what we call “moving to the hobs.” The hobs are a grate over the middle of the firebox onto which we will be stoking wood for the rest of the firing. The coals burning on the floor will ignite the wood on the hobs and together the burning wood and the gasses from the coals will allow the temperature to rise even more.
Here’s how we move to the hobs: I stoke one last time on the firebox floor, then stoke for the first time on the hobs. I open the primary air intake and then brick up the hearth door. On this particular day, the wind is a pretty steady cross breeze, so I open the secondary air holes partway and shield them from the wind with a diagonally-cut brick. This amount of air intake allows for a steady, but not too quick rise in temperature.

12:00 pm: 1594 degrees. The wind is making the kiln a little rabbitty. When the wind blows, the temp rockets up, then plummets as the wind drops. But on average, the temp is still rising, about 200 degrees an hour, which is what we’re shooting for.
1:00: 1876. Every stoke I’m stuffing in as much wood as I can onto the hobs, and then I keep an eye on the primary air-holes–when I can see through them that the wood level has dropped, it’s time to stoke again.
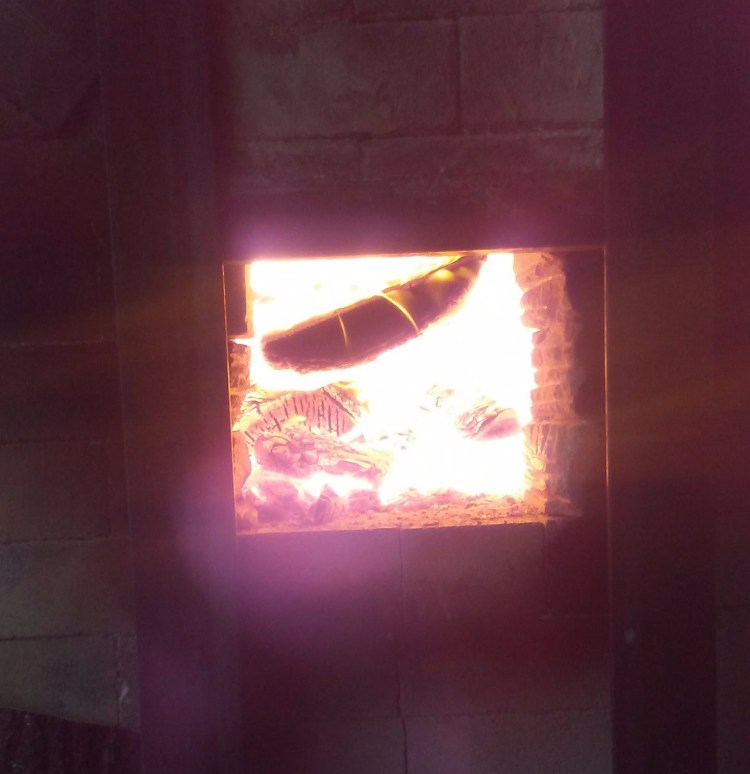
- A view of the wood on the hobs. If this were the smell-ernet, you’d be smelling wood-smoke and my burning leather gloves.
2:00: 2067 degrees. The wind has died, so I open up the secondary air holes. With the increase in heat, the kiln needs more air anyway.
3:00: 2230 degrees. Sometimes I have to insert a pipe through the secondary air holes to poke the wood a little, getting it to drop onto the ember pile and giving more room to stoke on the hobs. The tricky thing with firing a bourry box kiln is maintaining a proper level of coals on the floor of the firebox. Let it burn too low and the fire on the hobs gets sluggish. Let too much wood fall onto the ember pile and the arch between the firebox and the ware chamber (aka “throat arch”) gets clogged with embers. So keeping the wood on the hobs is a good thing, but poking it down occasionally does rocket the temperature up. I can check the level of the ember pile by opening one of the lower peep-hole bricks.

3:15: 2300 degrees. My thermocouple begins to melt at 2300, so I have to pull it out. From now on, I read temperature through a set of pyrometric cones which I’ve set in the kiln. Each one melts at a different temp, so when one has melted and another hasn’t, I can tell the kiln is somewhere between the two cones, say, 2300 and 2320 degrees. For all you potters out there, I’ll admit that somewhat randomly I’ve chosen cones 5, 8, and 10.
3:45: I have two spots in the kiln where I’ve set cones, one near the top of the setting, one near the bottom. Cone 8 is down on the bottom, half down on top.
4:30: Cone 10 bending on the bottom and on the top it’s softening. I stop stoking. I putter around, picking up and putting things away, waiting for the wood on the hobs to burn all the way down. This takes about a half hour, and by that time cone 10 is all the way down on the bottom and nicely bent on the top. I close up the air-intake holes, close the damper on the chimney, and burn rubber on the way home.
As an end note, I would like to say proudly that I did nearly all of this firing by myself, with only an hour or two of help from J., my faithful side-kick. He was only busy UNLOADING THE STRAW BALES THAT WILL BE THE WALLS OF OUR HOUSE. While I was firing, a local farmer brought by 200 bales of straw in four trips with his dangerously overloaded antique farm truck. I’m so sad to say I didn’t get a picture for you (he was quite picturesque) because I was busy stoking wood.
And a final end note, a hearty thanks to Linda Christianson, a potter just across the river in Minnesota, who helped me figure out this whole wood-firing process. Last time, after two previous failed attempts, she midwifed my firing via phone call and gave me the hope and confidence I needed to attempt it again. I’m so grateful for her generous tutelage.
Also a few of the pots from the firing, in their native habitat. Over all it was a really great firing.


