
November, 2018
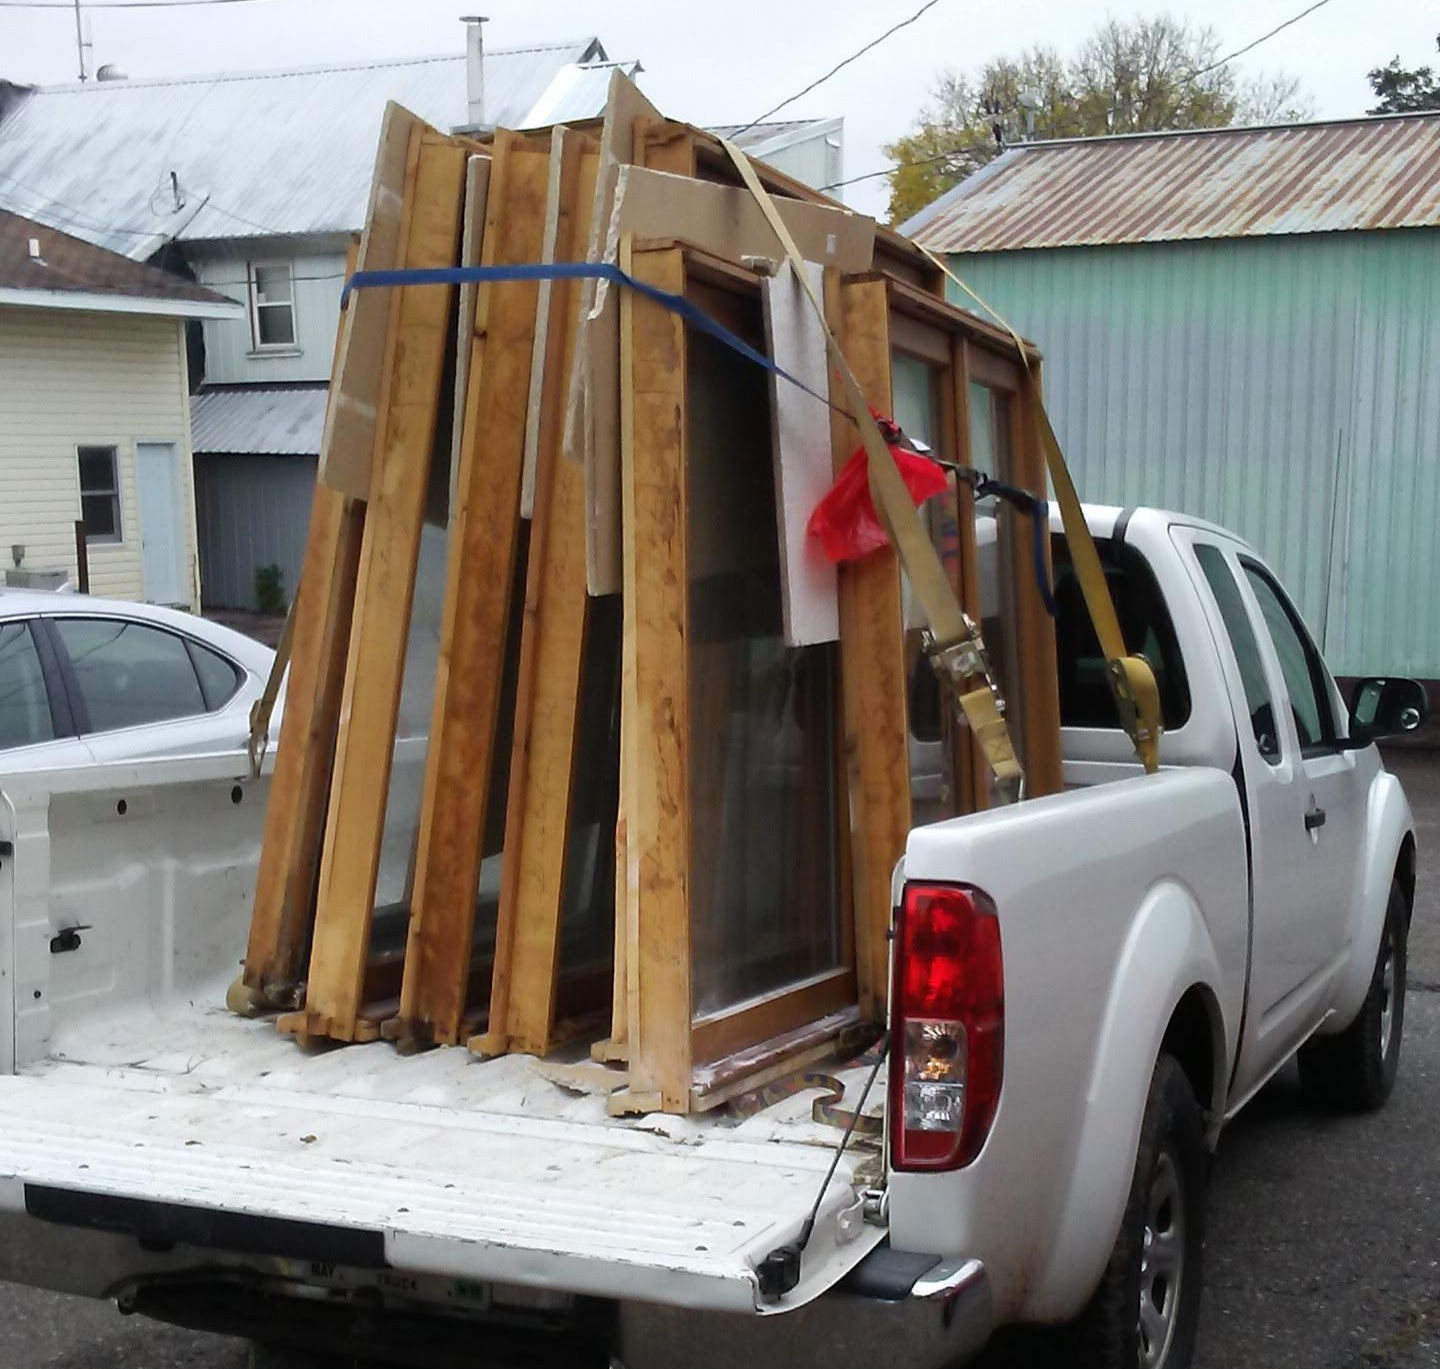
So our little timber house has been clothed with straw, capped with metal, and now it’s time to add some glass. This last element we acquired from a house nearby via Craigslist, an entire house-worth of old-school sliders from Anderson. We supplemented these with two new ones we bought for the same price as those 10 reclaimed windows.
They made a precarious, swaying stack in the truck, but J. assured me they would survive the trip up our rocky, bumpy path/default road to the house. And to my relief, he was not wrong.
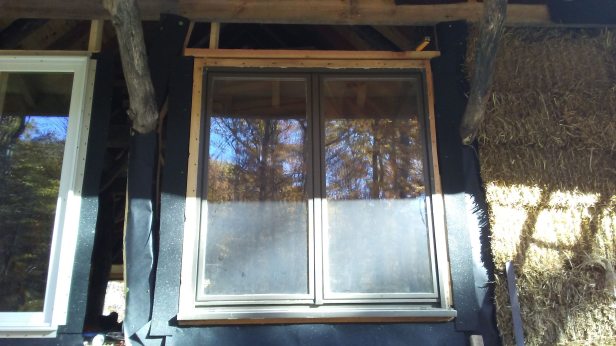
We had prepared the house to receive the windows by building window bucks, or frames, that sit on the straw bales and, because we’ve read “The Three Little Pigs,” we also attached them to the wooden structure of the house. We flashed each buck with sheets of ice & water shield, a thick, black tarpaper-like stuff, which will protect the bales below from any water that might leak into the window. The interior rough window sills, which are covered with plywood, also receive a layer of tarpaper, which runs down the exterior of the bales all the way to the base of the wall, another measure to keep those bales nice and dry and cozy.

It only took a day, with help from a friend, for all the windows to go in. The work went so smoothly that, like those Amish ladies who purposely build a mistake into each quilt because only God is perfect, I took it upon myself to drop a chunk of lumber through one of the installed panes. I’m always looking for ways to be helpful.


Now for the work of completing the wall around each window.
We started with the window seats. My brother-in-law had given us the lumber from a white pine they had cut down–an entire tree’s-worth of miscellaneous boards ranging from half-inch sliver planks to great slabs of wood 4 inches thick and 20 inches wide. These last pieces we’re milling into our window seats. We debated leaving the live edge on the front of the benches, but in the end we figured our house will have plenty of “live edge” and could maybe benefit from the occasional straight line. So we trimmed them straight and will round them a bit with a plane to make a comfortable, organic bench front.

Three giant planks were enough to run nearly the length of the house for the window seats which line the south side. J. connected the three pieces with lap joints to make one continuous length of timber. He’s been missing the timber frame work, so he enjoyed cutting a few joints with the ol’ chisel and mallet.

We also constructed a three-sided box (I guess that makes it a tray) out of scrap plywood and 2×4, to act as a header over the windows. This will support additional bales stacked above the windows. We mounted the header about four inches above the window to allow for a curved window-opening in the bale wall. If this doesn’t make sense, keep reading. Hopefully the pictures will clarify things, if my clumsy words don’t.

Once the headers were permanently supported with posts running up from the window seats, we started sculpting the curved openings around the windows. The way we’re doing this is by building baskets of diamond lath (affectionately named “blood lath” because it consists entirely of sharp edges) and then using our fists to ram the baskets full of straw, handful by handful, until not a straw more will fit. We start with the basket covering that four inch gap between the header and the top edge of the windows…

…and once that’s done we start on the sides of each window. Below is the narrow space between two windows. Stuffing it with straw will both insulate the wall and provide a sculptural pillar supporting the wall above.


The finished baskets really do look like elegantly curved pillars between each window, and I love how they look. They’re not designed only for their elegance, though. The openings to the windows are curved to allow as much light as possible into the room. And maybe you can tell from all the dim, grainy photos I’ve taken, this is November, which in our neck of the woods is the cloudiest, darkest month of the year, so we’ve got to make the most of what we have.
I’ve been eating my lunches in the window seats to absorb as much of that meager light and heat as I can, and I’ve discovered, leaning against those pillars, that they’re stuffed so firmly they don’t move or bend at all. They’re like…well, pillars. I hope this means that when we get around to plastering the walls with all their baskets, such a sturdy foundation will make the job (wink, wink) easy.
Before I end, I’d like to draw your attention to the fact that I have not been complaining very much in this post. I know, this is a big change. Turns out, as long as you wear enough clothes, twenty degrees is not a bad temperature for doing this sort of work. First, there are no bugs. Second, I have a roof over my head (a beautiful thing yet to lose its luster!) so rain or snow isn’t a problem. And since I have so many layers on that I look like a walking toasted marshmallow, the straw can’t reach my skin to irritate it. I’m discovering that the trick to dressing in layers is to wear enough to stay warm, but still fit inside the house, and/or be able to move one’s arms and legs.
Bring on your real cold, Winter. I’m not afraid of you.
