
August, 2019
Even before we were done plastering, we began to whitewash our walls. Whitewash is the simplest paint ever–lime and water, mixed. You can add colorant (but that would make it not-whitewash, wouldn’t it? And in our shaded, woodsy, non-electric house we need all the brightness and light reflection we can get). You can add other ingredients, like linseed oil or quark (but these days we need all the simplicity we can get too). So for us, mixing more paint was as simple as going to the barrel of lime soaking in water, scooping some out, and whisking water in until it looked like paint.

Here in Wisconsin we’re familiar with limewash/whitewash because they used to paint barn interiors with the stuff, but it’s infamous here for its powdery, flaky texture. That’s because it doesn’t adhere well to wood. However, when painted over lime plaster, limewash cures into a tough, stone-like surface similar to its parent material, limestone.
We painted the limewash right onto wet plaster, the day after each wall received its final coat of plaster. The fresh limewash on top of the wet wall helps each component dry slower, curing harder.

We painted on layer after transparent layer until we ended up with three coats of limewash, inside and out, which added up to a nice opaque white. It has quite a dry surface, similar to the “matte” paint you can get at the store, but more so. I imagine it’ll scuff easily, so I plan on keeping a bucket of limewash under the sink for easy touch-ups. It keeps indefinitely.
OK, let’s do the slideshow here, because in the last blog entry I had exactly zero pictures of the finished walls, and you’ve been waiting so patiently.


Now for the outside:
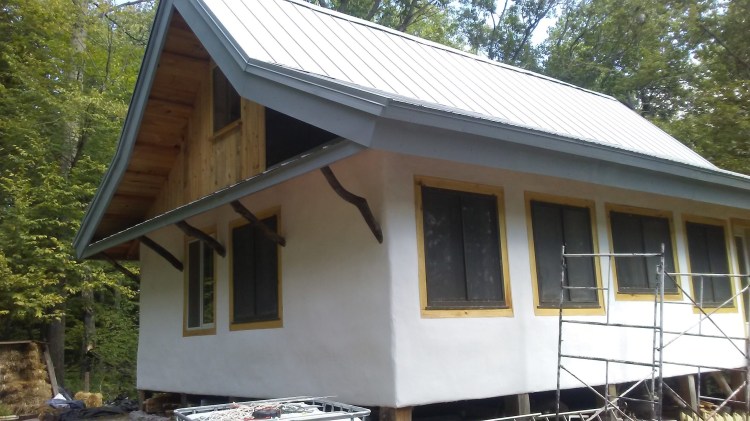

A word of caution about limewash and lime plaster–it stains wood. We had read this but let our dropcloths lapse in places, figuring a little scraping would cure all. This was true for aspen, from which the lime scraped easily and completely, but less so for pine, which took some persistent sanding to erase deeper stains. Most affected by the lime was our oak baseboard, which turned black where the lime soaked in. Sanding it has been onerous, and the stains seem to go deeper than we can sand. We’ll probably end up applying a dark stain, but we’re not sure how well it will cover up the lime spots.
So. I know it’s been said before, but it bears repeating: keep your wood dry.
And that’s as good a way as any to end this post.
