August, 2019
Some people run marathons. Some climb mountains. Some walk burning coals. We build a house.
Let me catch you up on our adventure of choice. I haven’t written much lately because my hands have been too tired and sore to type. I know, whine, whine. Turns out, plastering is hard! It’s heavy! It does not always want to stick to the wall!
We were totally right to fear it.
It was so hard that we didn’t accept help from our friends who offered, fearing they would no longer be our friends after the jobs we would make them do. So we only asked for help from people we didn’t like.
🙂
So where were we? After the first coat of plaster we took a few days to camp on the shore of icy Lake Superior, refreshing ourselves. It’s nice that the plaster has to cure for 14 days before the next coat–this enforces a break, in which you can stack stones, or try to get in the water. Or just lie around and…not plaster walls.

When we got back to the house, we were encouraged to see that our mushy, squashy harl coat of lime plaster had cured nice and hard. Rapping on the walls with a knuckle yielded a skinned knuckle. So far, so good.
We started the second coat of plaster. Whereas the point of the first coat is to create a good bond between the straw bale walls and the wall, the second coat is the leveling coat, in which you try to create a flat wall. So in some places we built it up to an inch thick or so, and in some places it’s barely a skim over the previous coat. Some people also call this the float coat, because you scrub/burnish/”float” the plaster as it dries to compress it, which also heals any cracks and raises the grain to key into the next coat.
The recipe was mostly the same as the first coat, with slightly less lime, the theory being that as you move outward from the straw bales, you need more strength from the sand and less anti-fungal, moisture-wicking magic from the lime. So:
- 2 (4 gal.) buckets sand
- 2/3 (4 gal.) bucket lime putty
- 1 (1 gal.) bucket straw shavings
- 1/3 gal. grog
- water
(For more details on the materials, see my previous blog entry.)


As in the previous coat, we wet the wall down with water before applying the plaster, and then sprayed it daily for a few days as it dried. After this layer dried a little, we floated it with the hard rubber float, which further leveled the wall, burnishing out the worst of the tool-marks and compressing its surface. This takes a lot of force–the action feels more like scrubbing dirt out of your kitchen floor than the ephemeral-sounding “float.” Then we scratched it again.
Into the plaster, while it was quite wet, I pressed a few tiles for a backsplash behind the kitchen counter and also as baseboard around the curved entryways. I’m not sure if this was a good idea–time, I suppose, will tell. I did it this way so we can trowel the final coat of plaster right up to the edges of the tiles, but I’m worried that the plaster won’t adhere well to the tiles. I guess we’ll know it was a bad idea if they start popping off into my bread dough.

I have no pictures of the floating because I was just trying to keep my head above water. Or, to try another metaphor: I was busy undergoing a trial by fire. That’s how it felt. You don’t take pictures as you’re drowning, or burning. Mornings we watered the previous day’s wall, floated it (this took an hour or more per wall), and scratched it, then watered the wall we’d work on that day, all before finally settling down to mix plaster and trowel it on. So we’d barely get a load of plaster mixed and on the wall before we’d feel all wobbly and need to eat lunch. Then we’d work until the wall was done and drag ourselves home to root around for something for supper, drinking pickle juice like mother’s milk to rehydrate, and then bide our time until an acceptable hour to retire.
Therefore, the pictures are rare.

Here’s what the kids did while we put on the second coat:

So after two weeks of work we finished the second coat, inside and out, strung up the tarp to slow the plaster’s curing, and then headed to Lake Michigan. Because apparently that’s what you do while plaster cures: you go visit a Great Lake.
By the time we got back from Michigan, it was the end of July and time to start–glory, hallelujah–the Final Coat. Here’s the recipe for this one:
- 2 (4 gal.) buckets of sand (I highly recommend using fine sand, but we couldn’t find any nice sharp fine sand without spending a week sieving the sand we had–so we just used our coarse sand and later only regretted it slightly)
- 2/3 (4 gal.) bucket of lime putty
- 1/3 (1 gal.) bucket grog
- water
The mix was mostly the same as the second coat, minus the straw–an exclusion which made the mud easier both to mix and apply. Plus the final coat is quite thin, just a skim coat really, so each batch went a lot farther, resulting in much less time at the wheelbarrow with the hoe. J., by now, had taken over plaster-mixing completely, a heroic task which he undertook without complaining (unlike someone we all know…).


The technique we used for the final layer of plaster was to scrape it on with the trowel like butter, then burnish it with a pool float, a delightful tool with round edges that don’t gouge and a flexible metal surface that rides the undulations of our wall without imposing it’s own sense of what’s vertical.


As long as I’m giving out recipes, let me share one for the homemade scrub/balm that saved our skins while we plastered. Even though we wore gloves, the lime still wormed its way into the gloves so that some days as we worked we seemed to be soaking our hands in alkaline water. And while it didn’t exactly burn, it worked on our skins like the salt you sprinkle onto a zucchini to draw out its moisture. So here you go:
Gardener’s Hand Scrub
- 1 c. sugar
- 1 T. sea salt
- 1/2 c. coconut oil
- 5 drops tea tree oil (if you have it on hand)
Melt coconut oil until liquid. Pour in sugar and salt and mix until sugar is thoroughly coated. Add essential oil and stir. Pour into container. To use, moisten skin and rub a pinch of the stuff all over hands and arms, scrubbing off bits of dried lime or dirt/whatever. Rinse and dry and revel in your recently moisturized, healed skin.
*
So we finished! Like magicians revealing a trick, we tore away the dropcloths and swept off the window seats. I have no pictures of the house complete! You’ll just have to stay tuned for the next entry (coming soon).
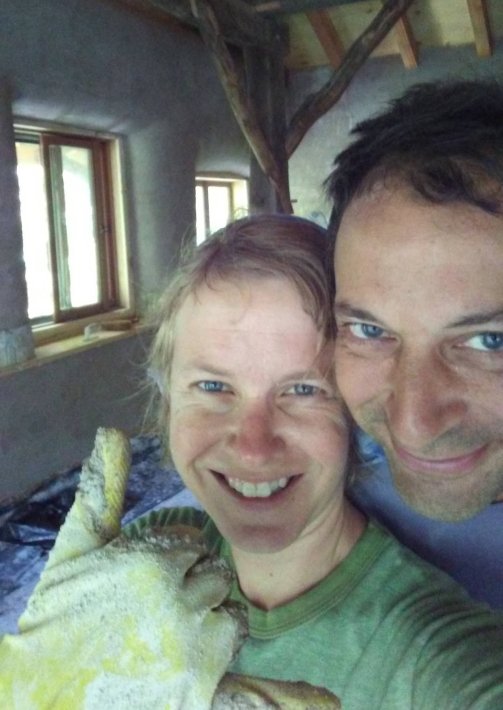
I know you’re disappointed, but here’s how we felt:

Oh, and by the way, here’s what the kids did while we put on the third coat:

*
Long before we had those bouncing little dears, J. and I took a trip to Italy, during which we borrowed some bikes and took it upon ourselves to pedal up a mountain. (Maybe in Tibet it would not be a mountain, but to this Midwesterner it was.) The road kept going upward in great curves–every corner we turned continued up hill, while my thighs screamed for relief. I wanted to walk my bike up. Or to call the view good enough, turn around, and sail back down. But J. said, “Just keep pedaling. You don’t have to pedal fast. Just keep pedaling.” So I did, and I reached the top still pedaling, elated, and it was worth it.
I’ve thought of that climb many times this summer, times I wanted to give up, and then I would hear J.’s voice in my ear: “Keep pedaling.” So I would. And we made it.
As if that weren’t enough, during this plastering summer I entered my fourth decade. Instead of feeling old and washed up (which is how I imagined it would be like to turn 40 back when I was turning 20), I’m stronger than I’ve ever been. Muscles have shown up under my skin that I’ve never felt before. More than that, though, I’ve gained a sense of courage and determination, a confidence in the labor of my body, that simply by not giving up, by keeping pedaling, I can arrive at somewhere great.
Because this mountain is almost climbed. We can see the summit from here.
