Summer Kitchen

November 2020 (backdated from May 2020).

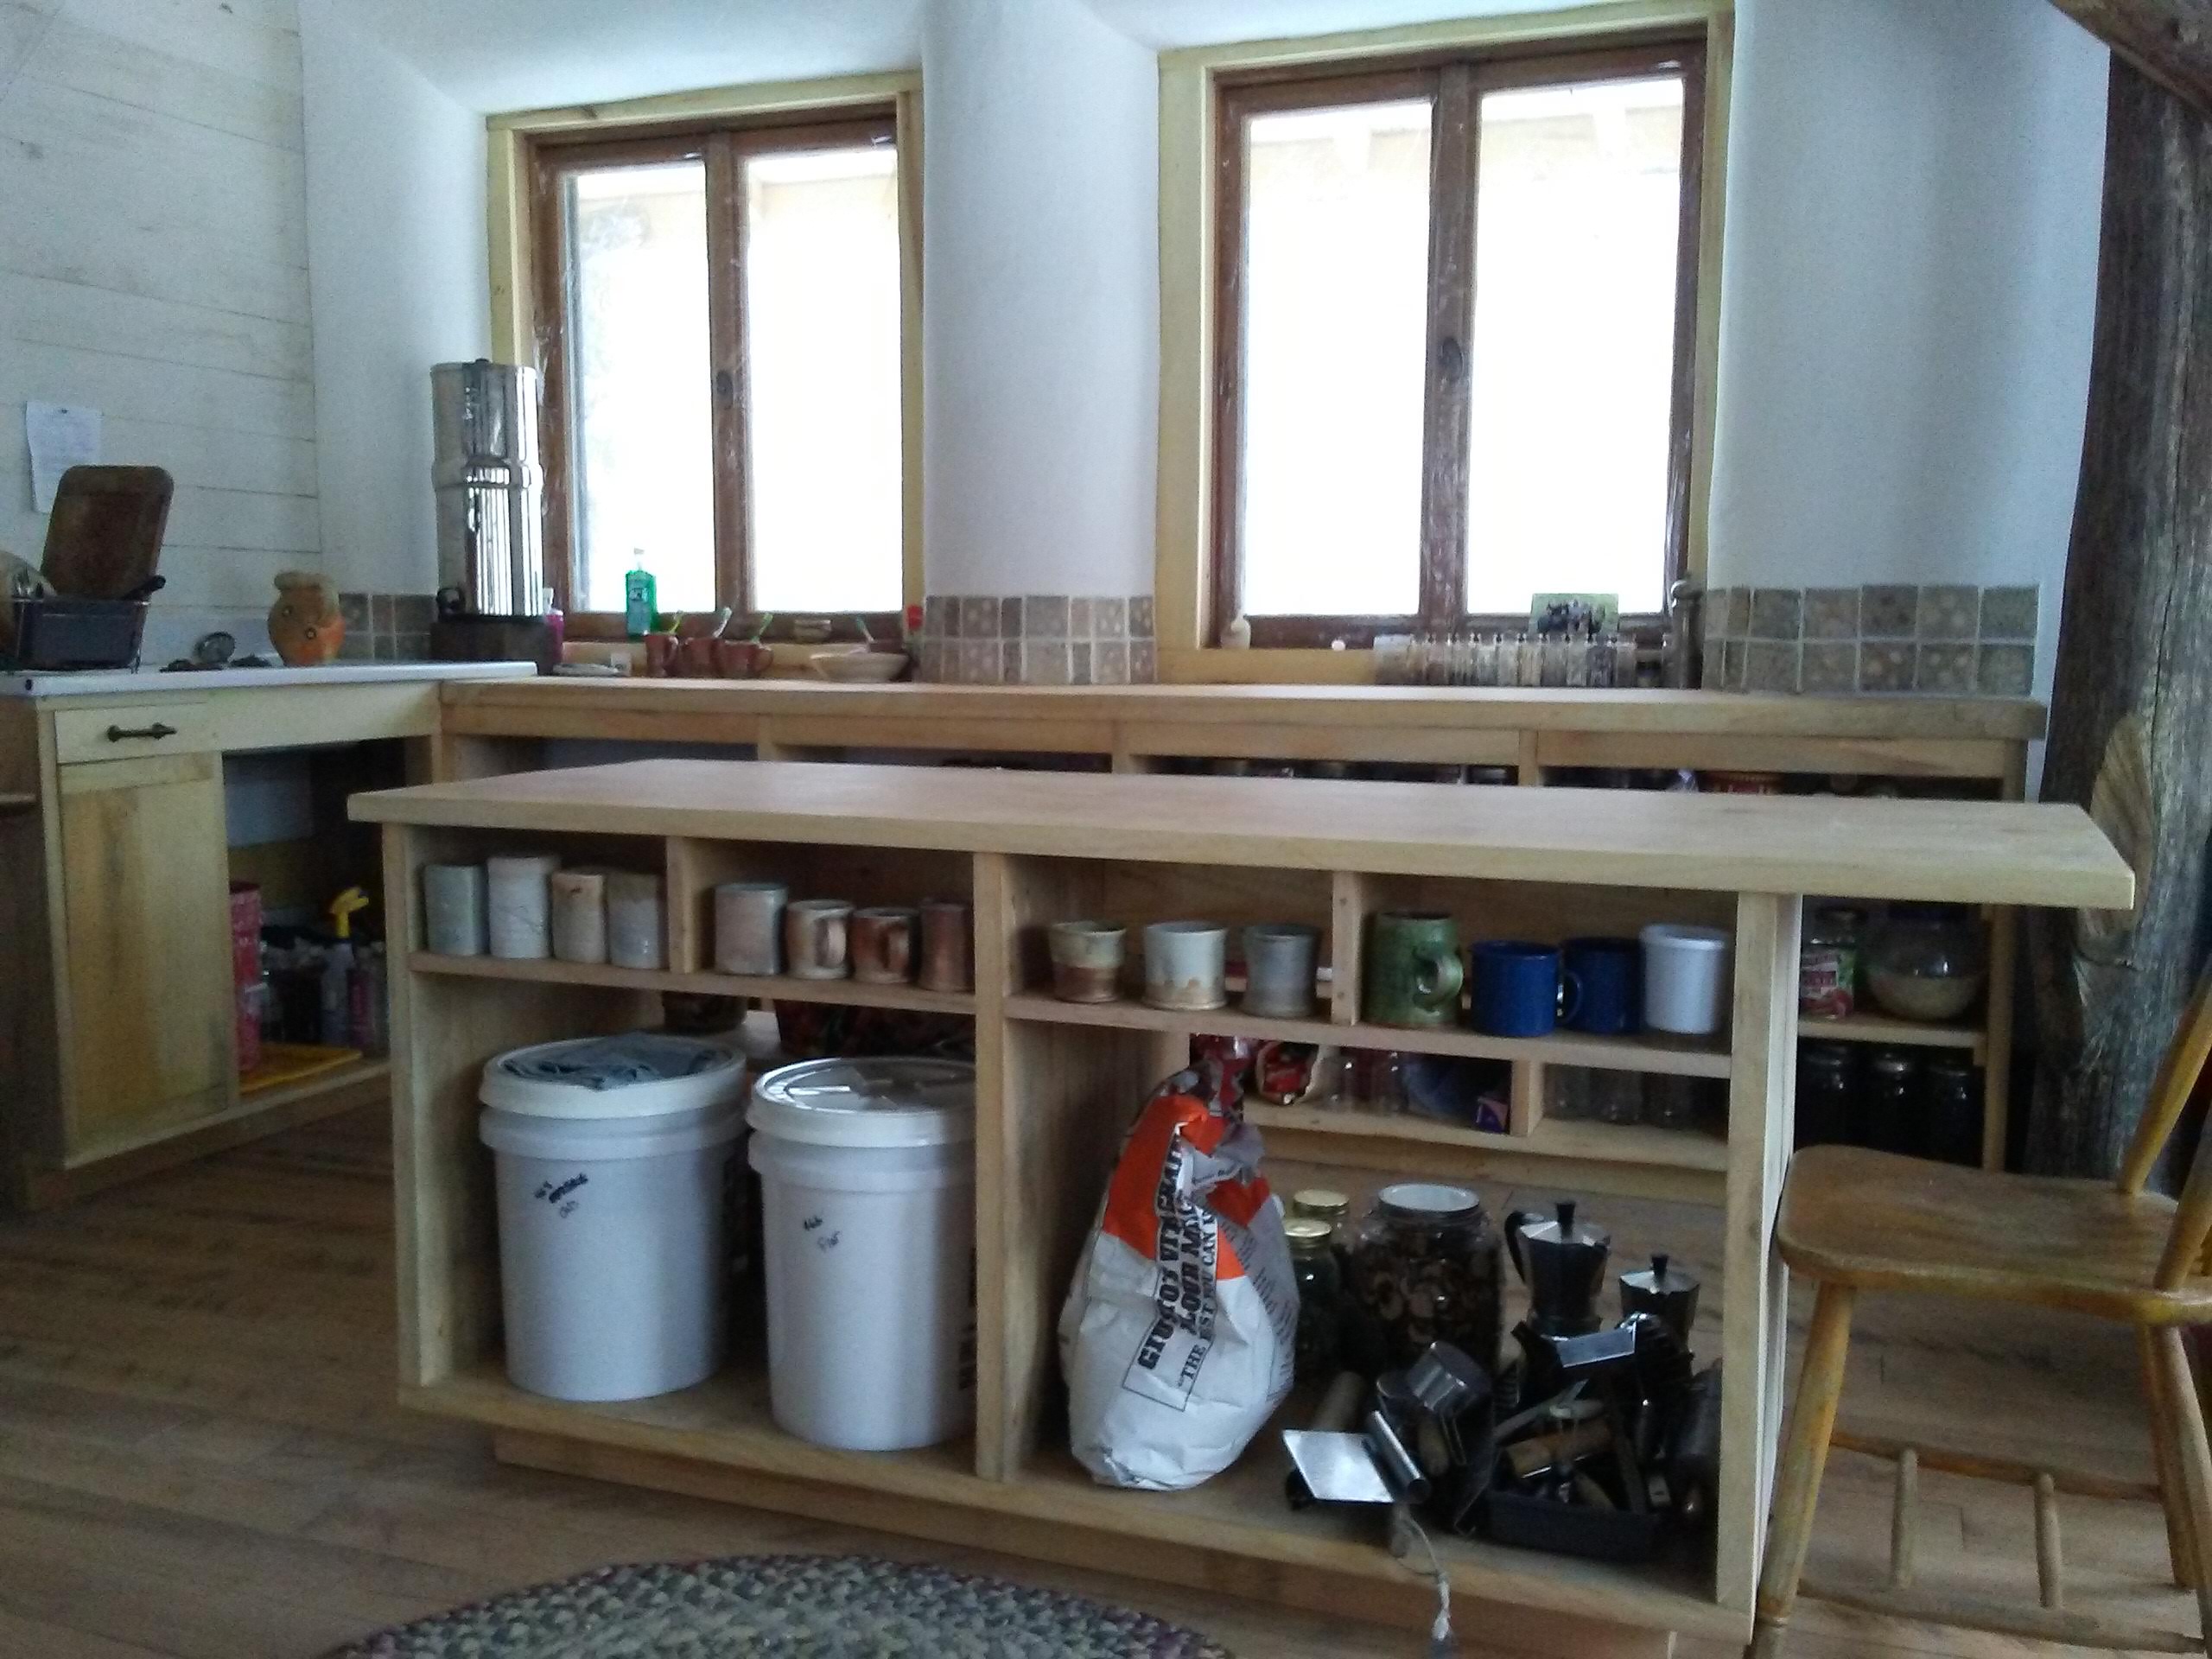
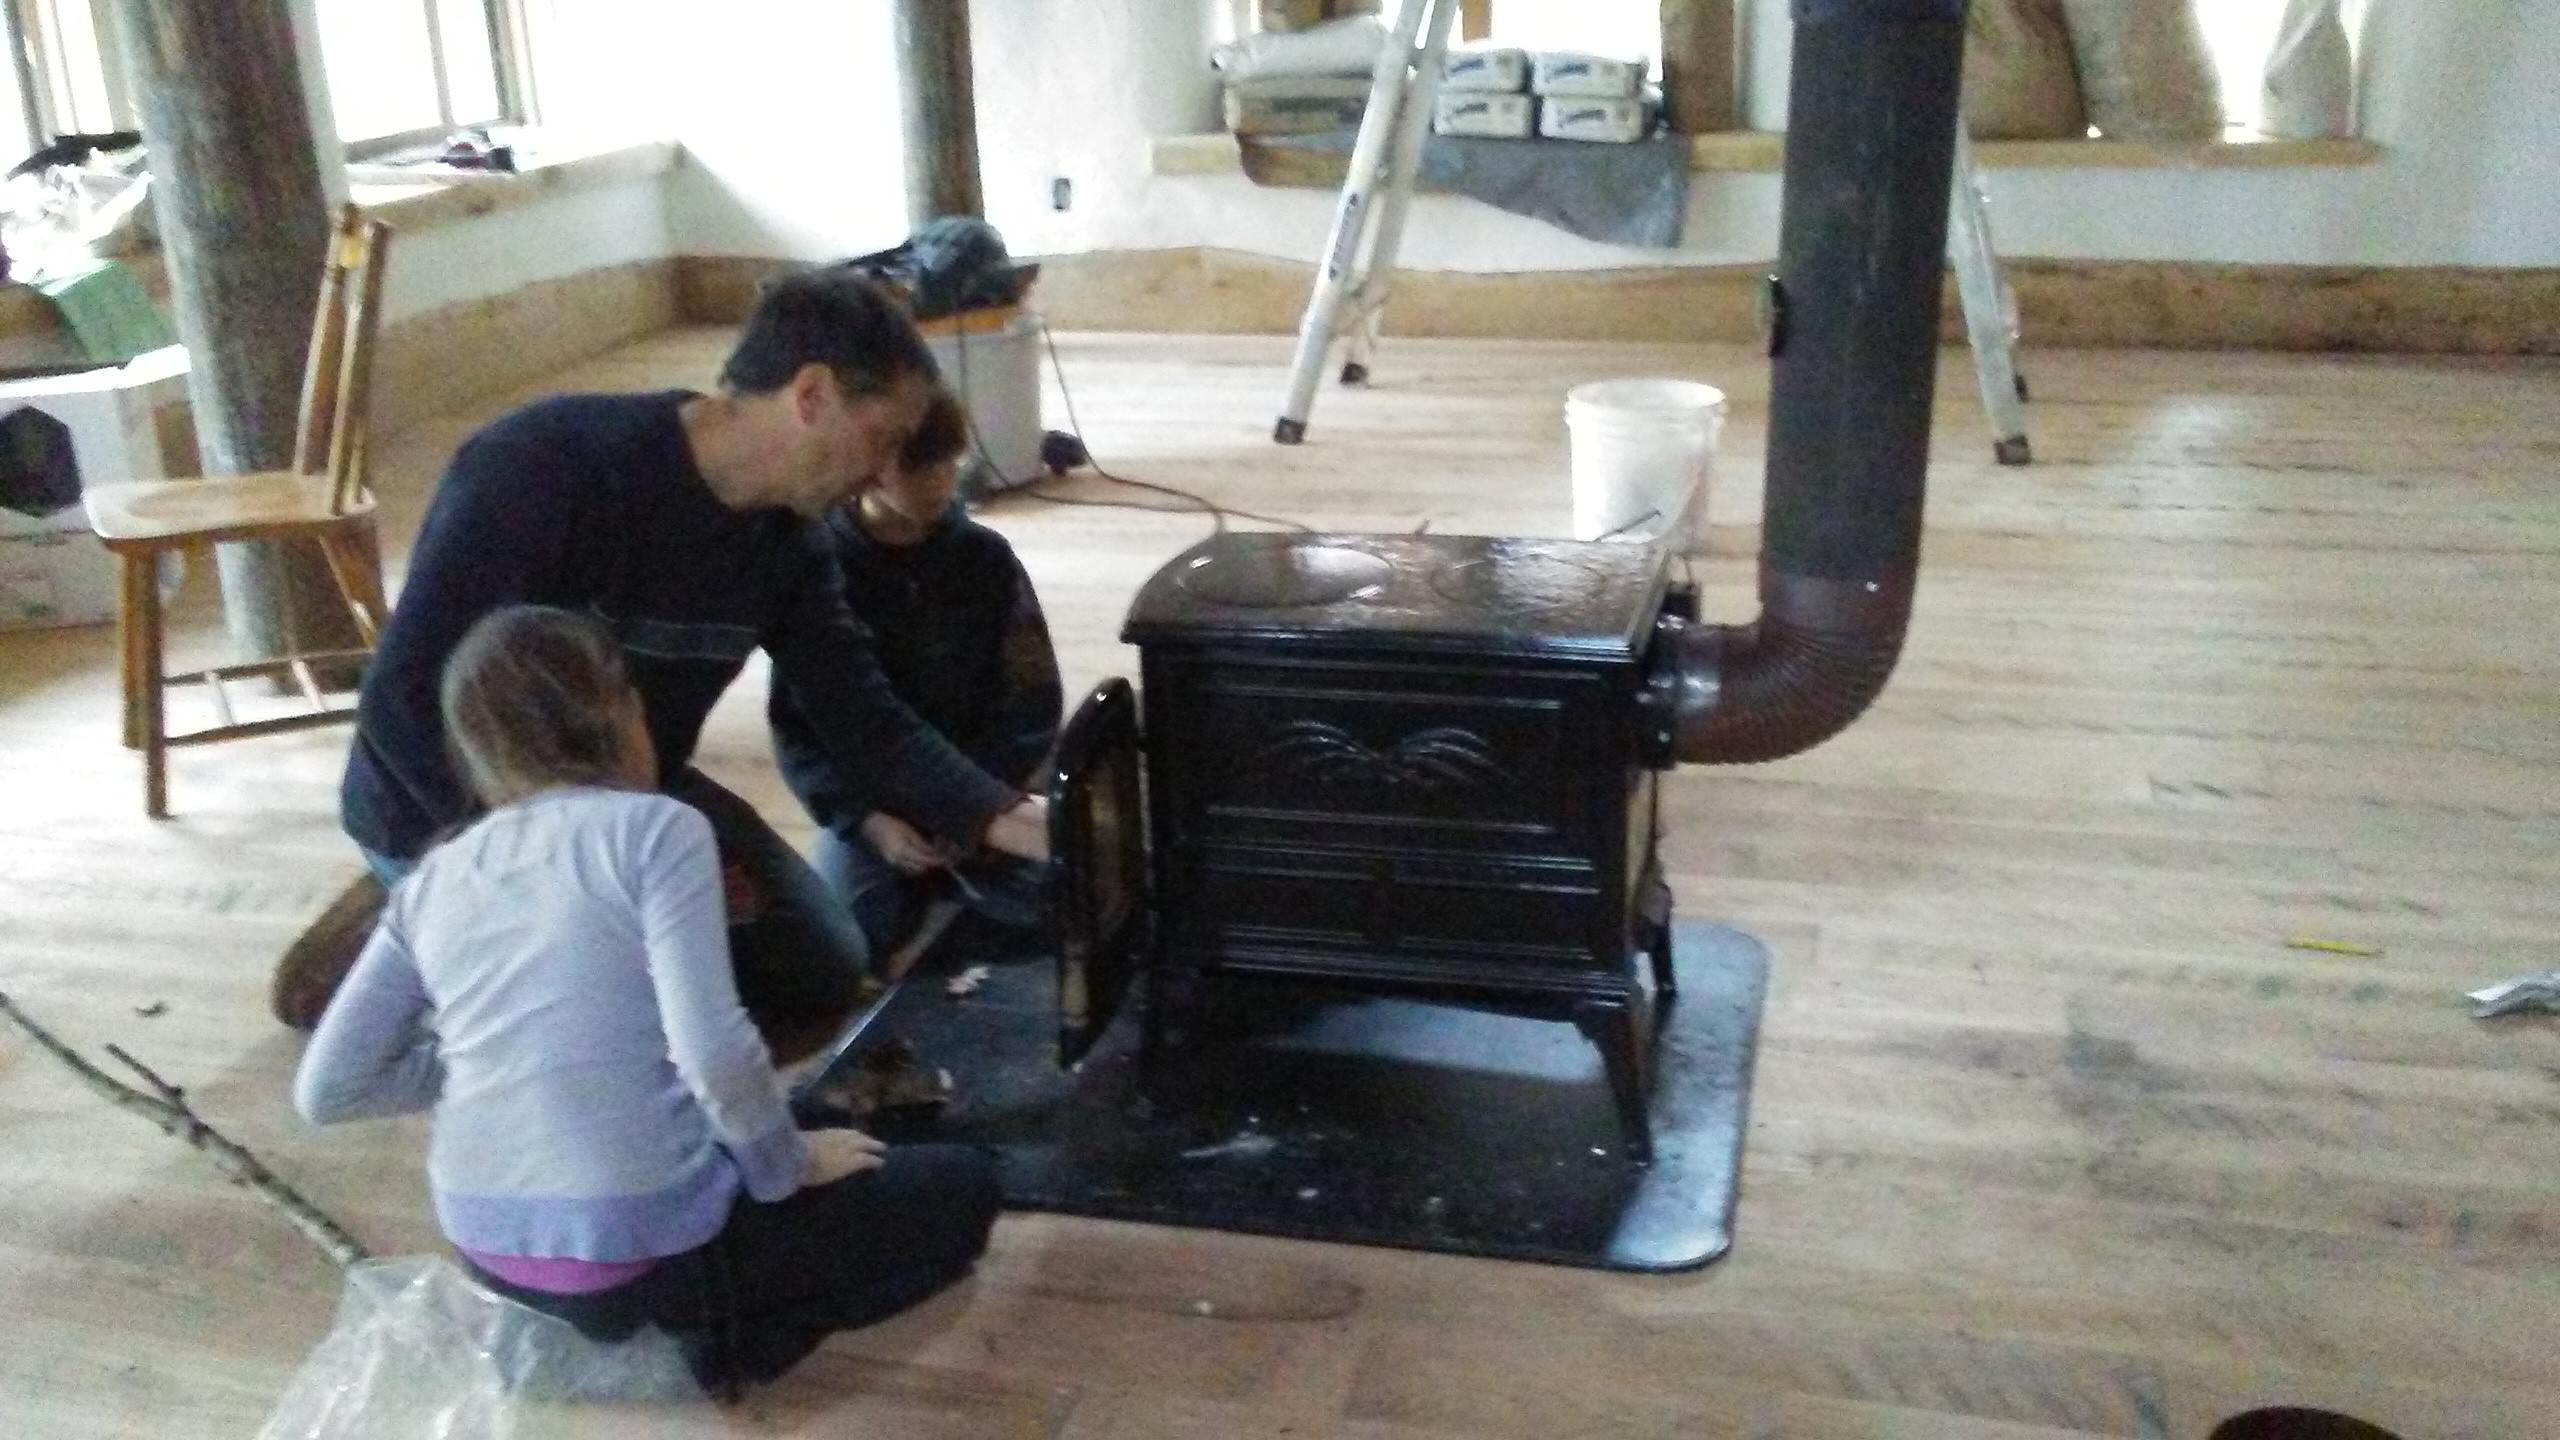
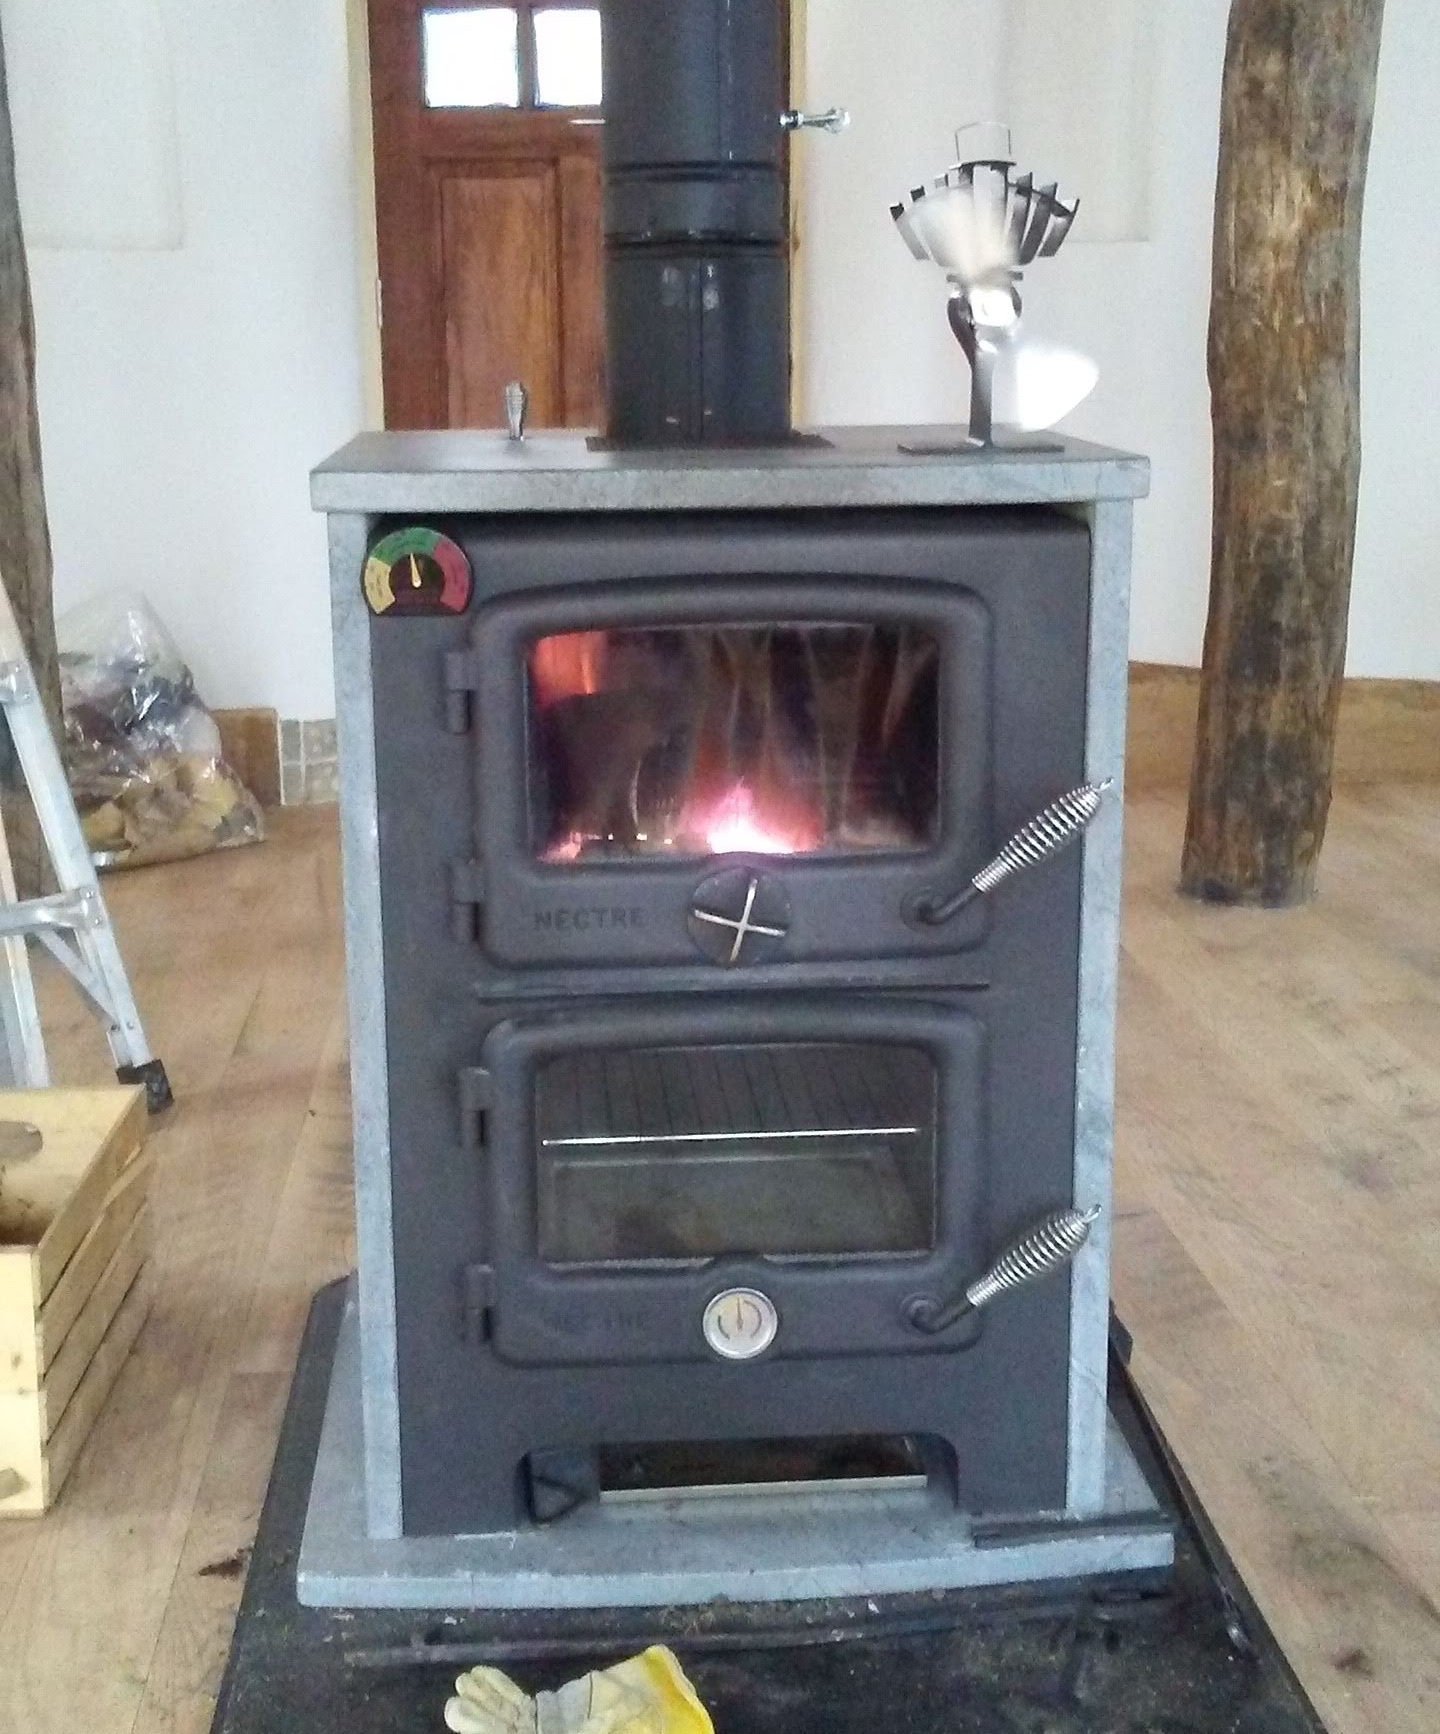
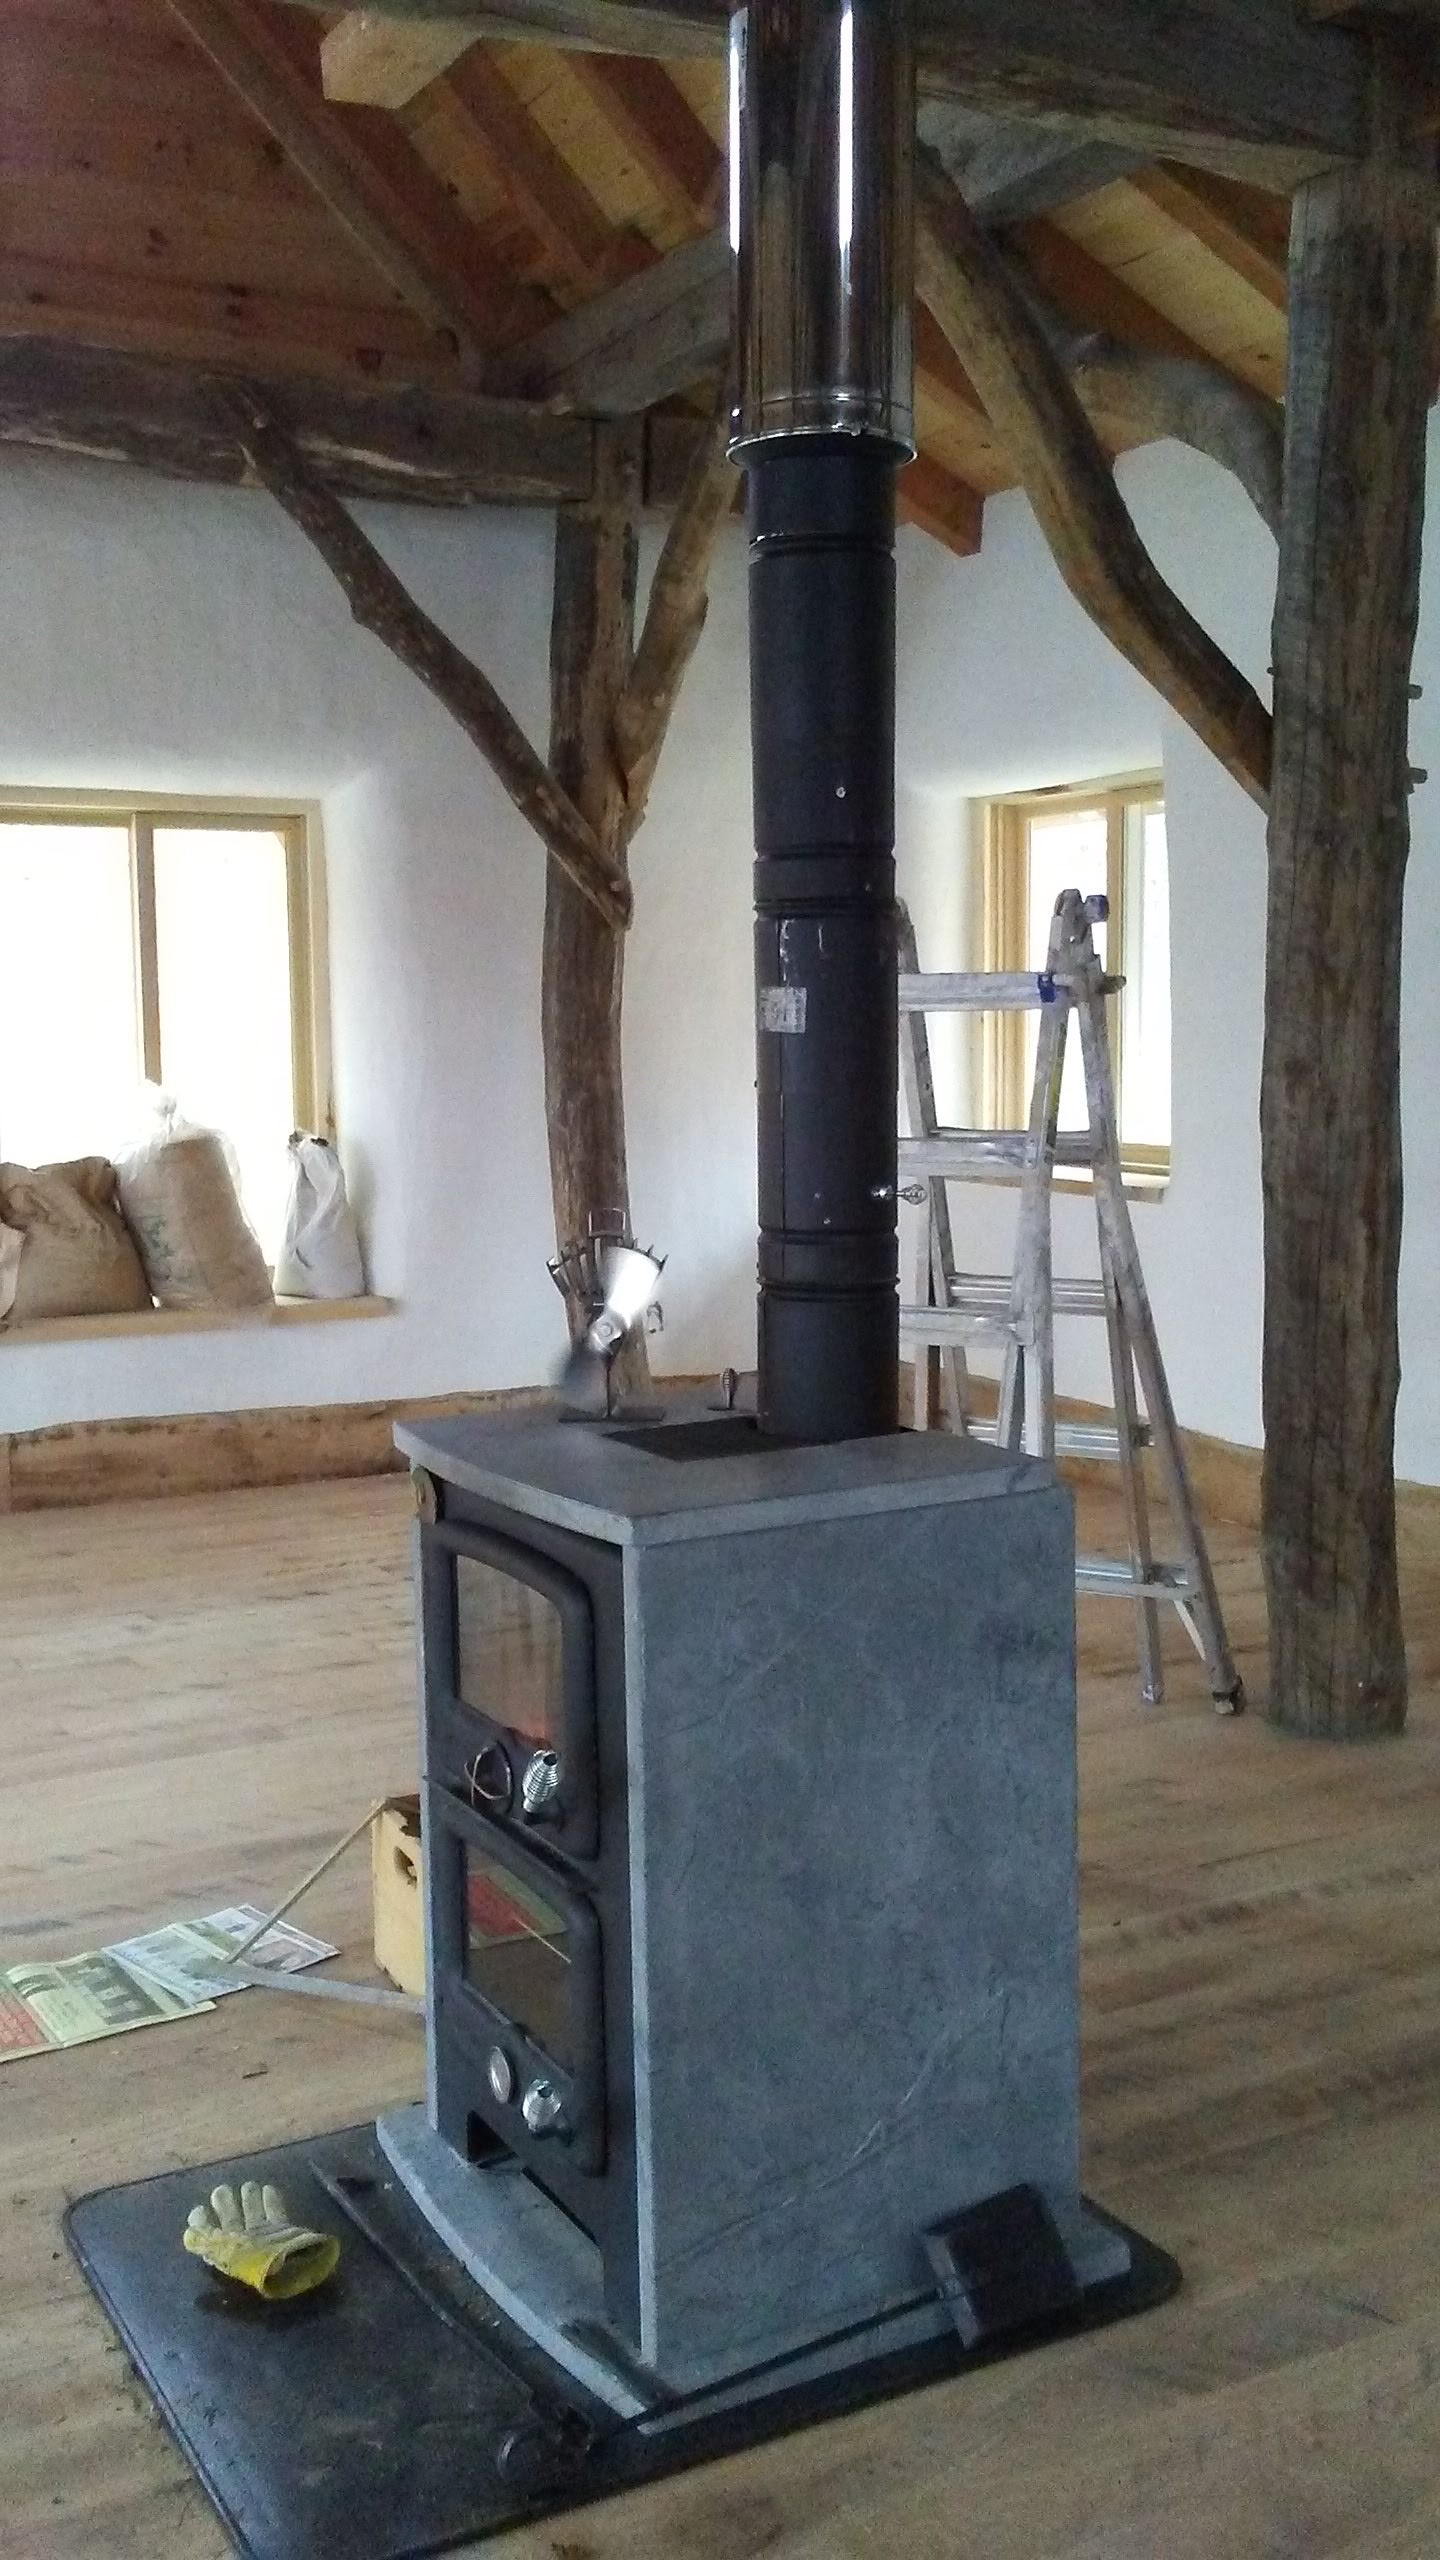
In my last entry, as I gushed about my counter space, I neglected to mention how, in our new kitchen, we actually cook our food. We use a beautiful woodstove, wrapped in soapstone to temper its heat, and it’s the ultimate multitool that’s not only our furnace and stove but also oven, water heater, toaster, clothes dryer, coffee maker, microwave, dehydrator, and, of course, TV. 

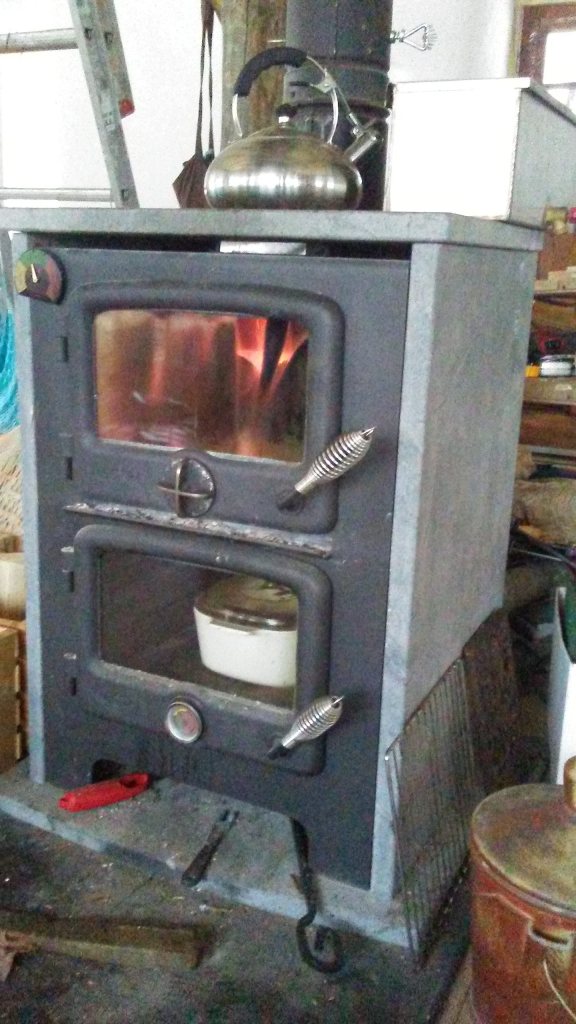
Which is all well and good in November, but what happens when June comes around? Because the woodstove’s giant limitation is that it’s a seasonal beast (it hibernates in the summer)—leaving a huge hole in our kitchen operations when it’s too hot to operate the furnace. Imagine warm weather rendering inoperable your stove, oven, water heater, toaster, coffee maker, and microwave. 

So. Now that we had a beautiful kitchen, we immediately proceeded to work on an outdoor version.

In the back of our minds, we had long been missing our outdoor pizza oven that we had had in the city. In fact, our mouths were positively watering for pizza. We knew that would be a big part of this outdoor kitchen.

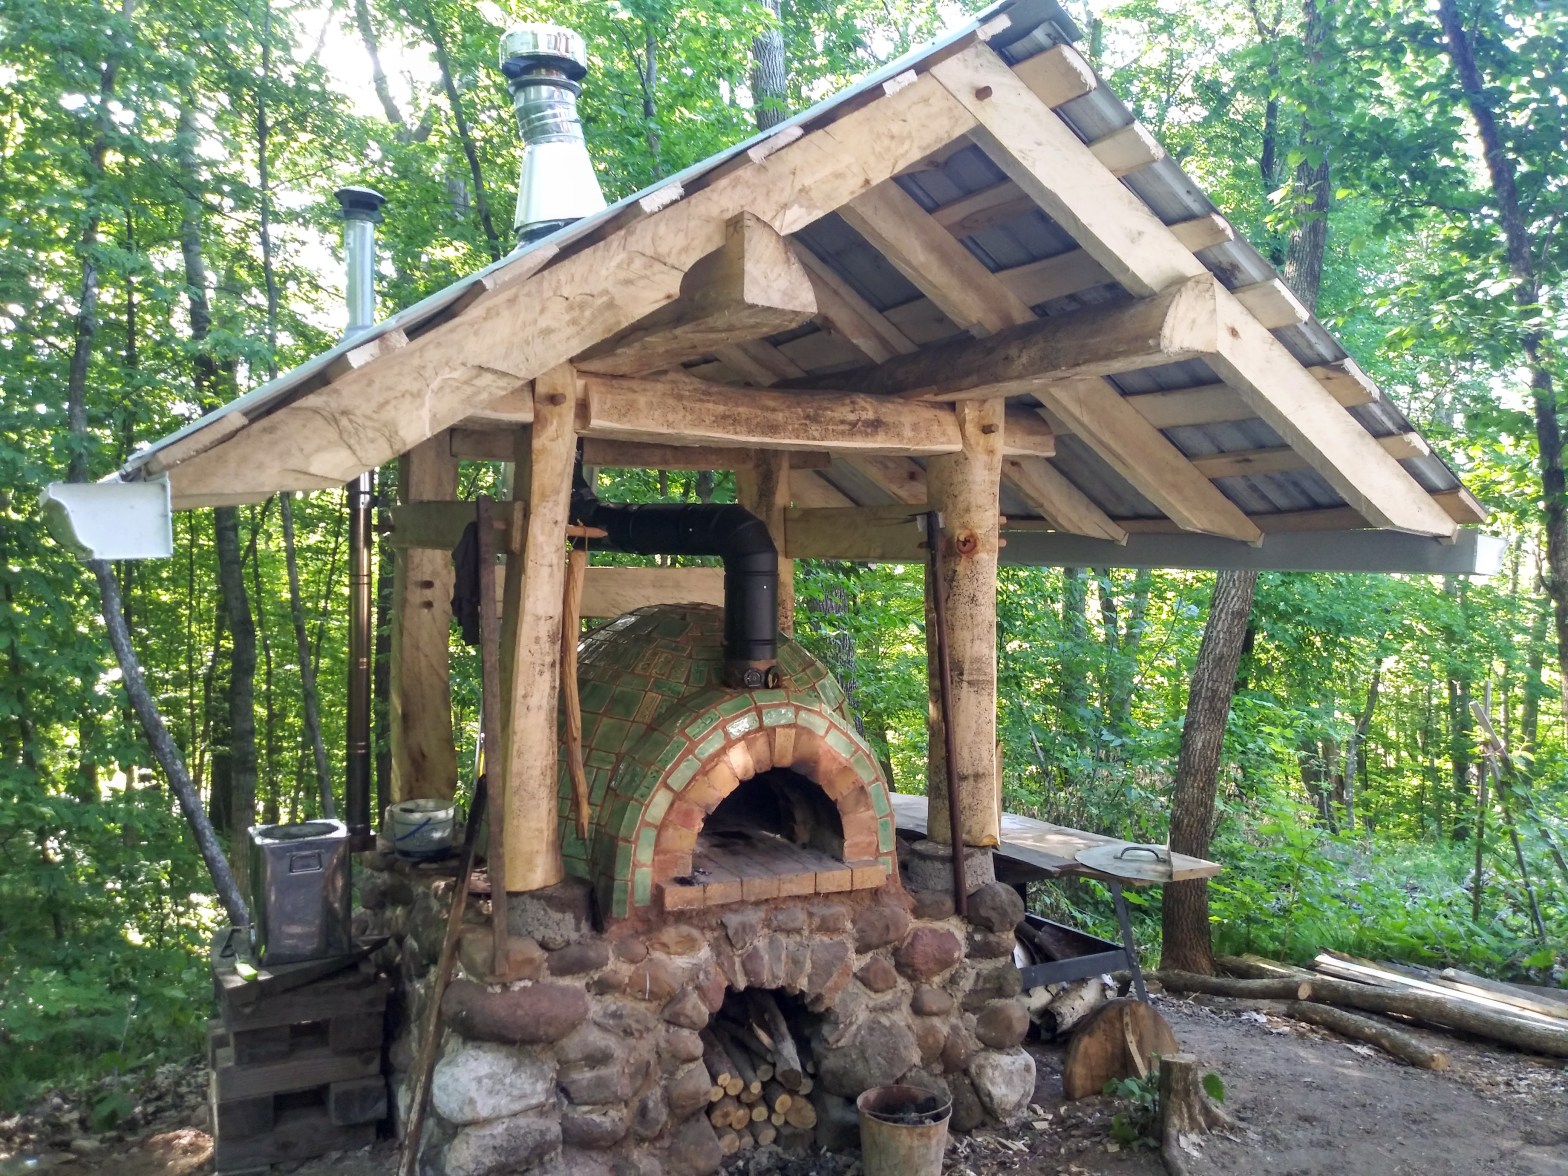
So that’s what we would start with. I had poured a cement slab foundation the previous fall, and erected over it a stone platform from glacial cobbles littering our hill. I’m no mason, and you can tell there was very little skill involved in this step, but it was pretty fun to fit the rocks together and glue them in place with mortar. 

I capped the platform with insulating firebricks and then a layer of firebrick (which I have on hand as one of the prerequisites of being a potter). This would become the floor of the oven.

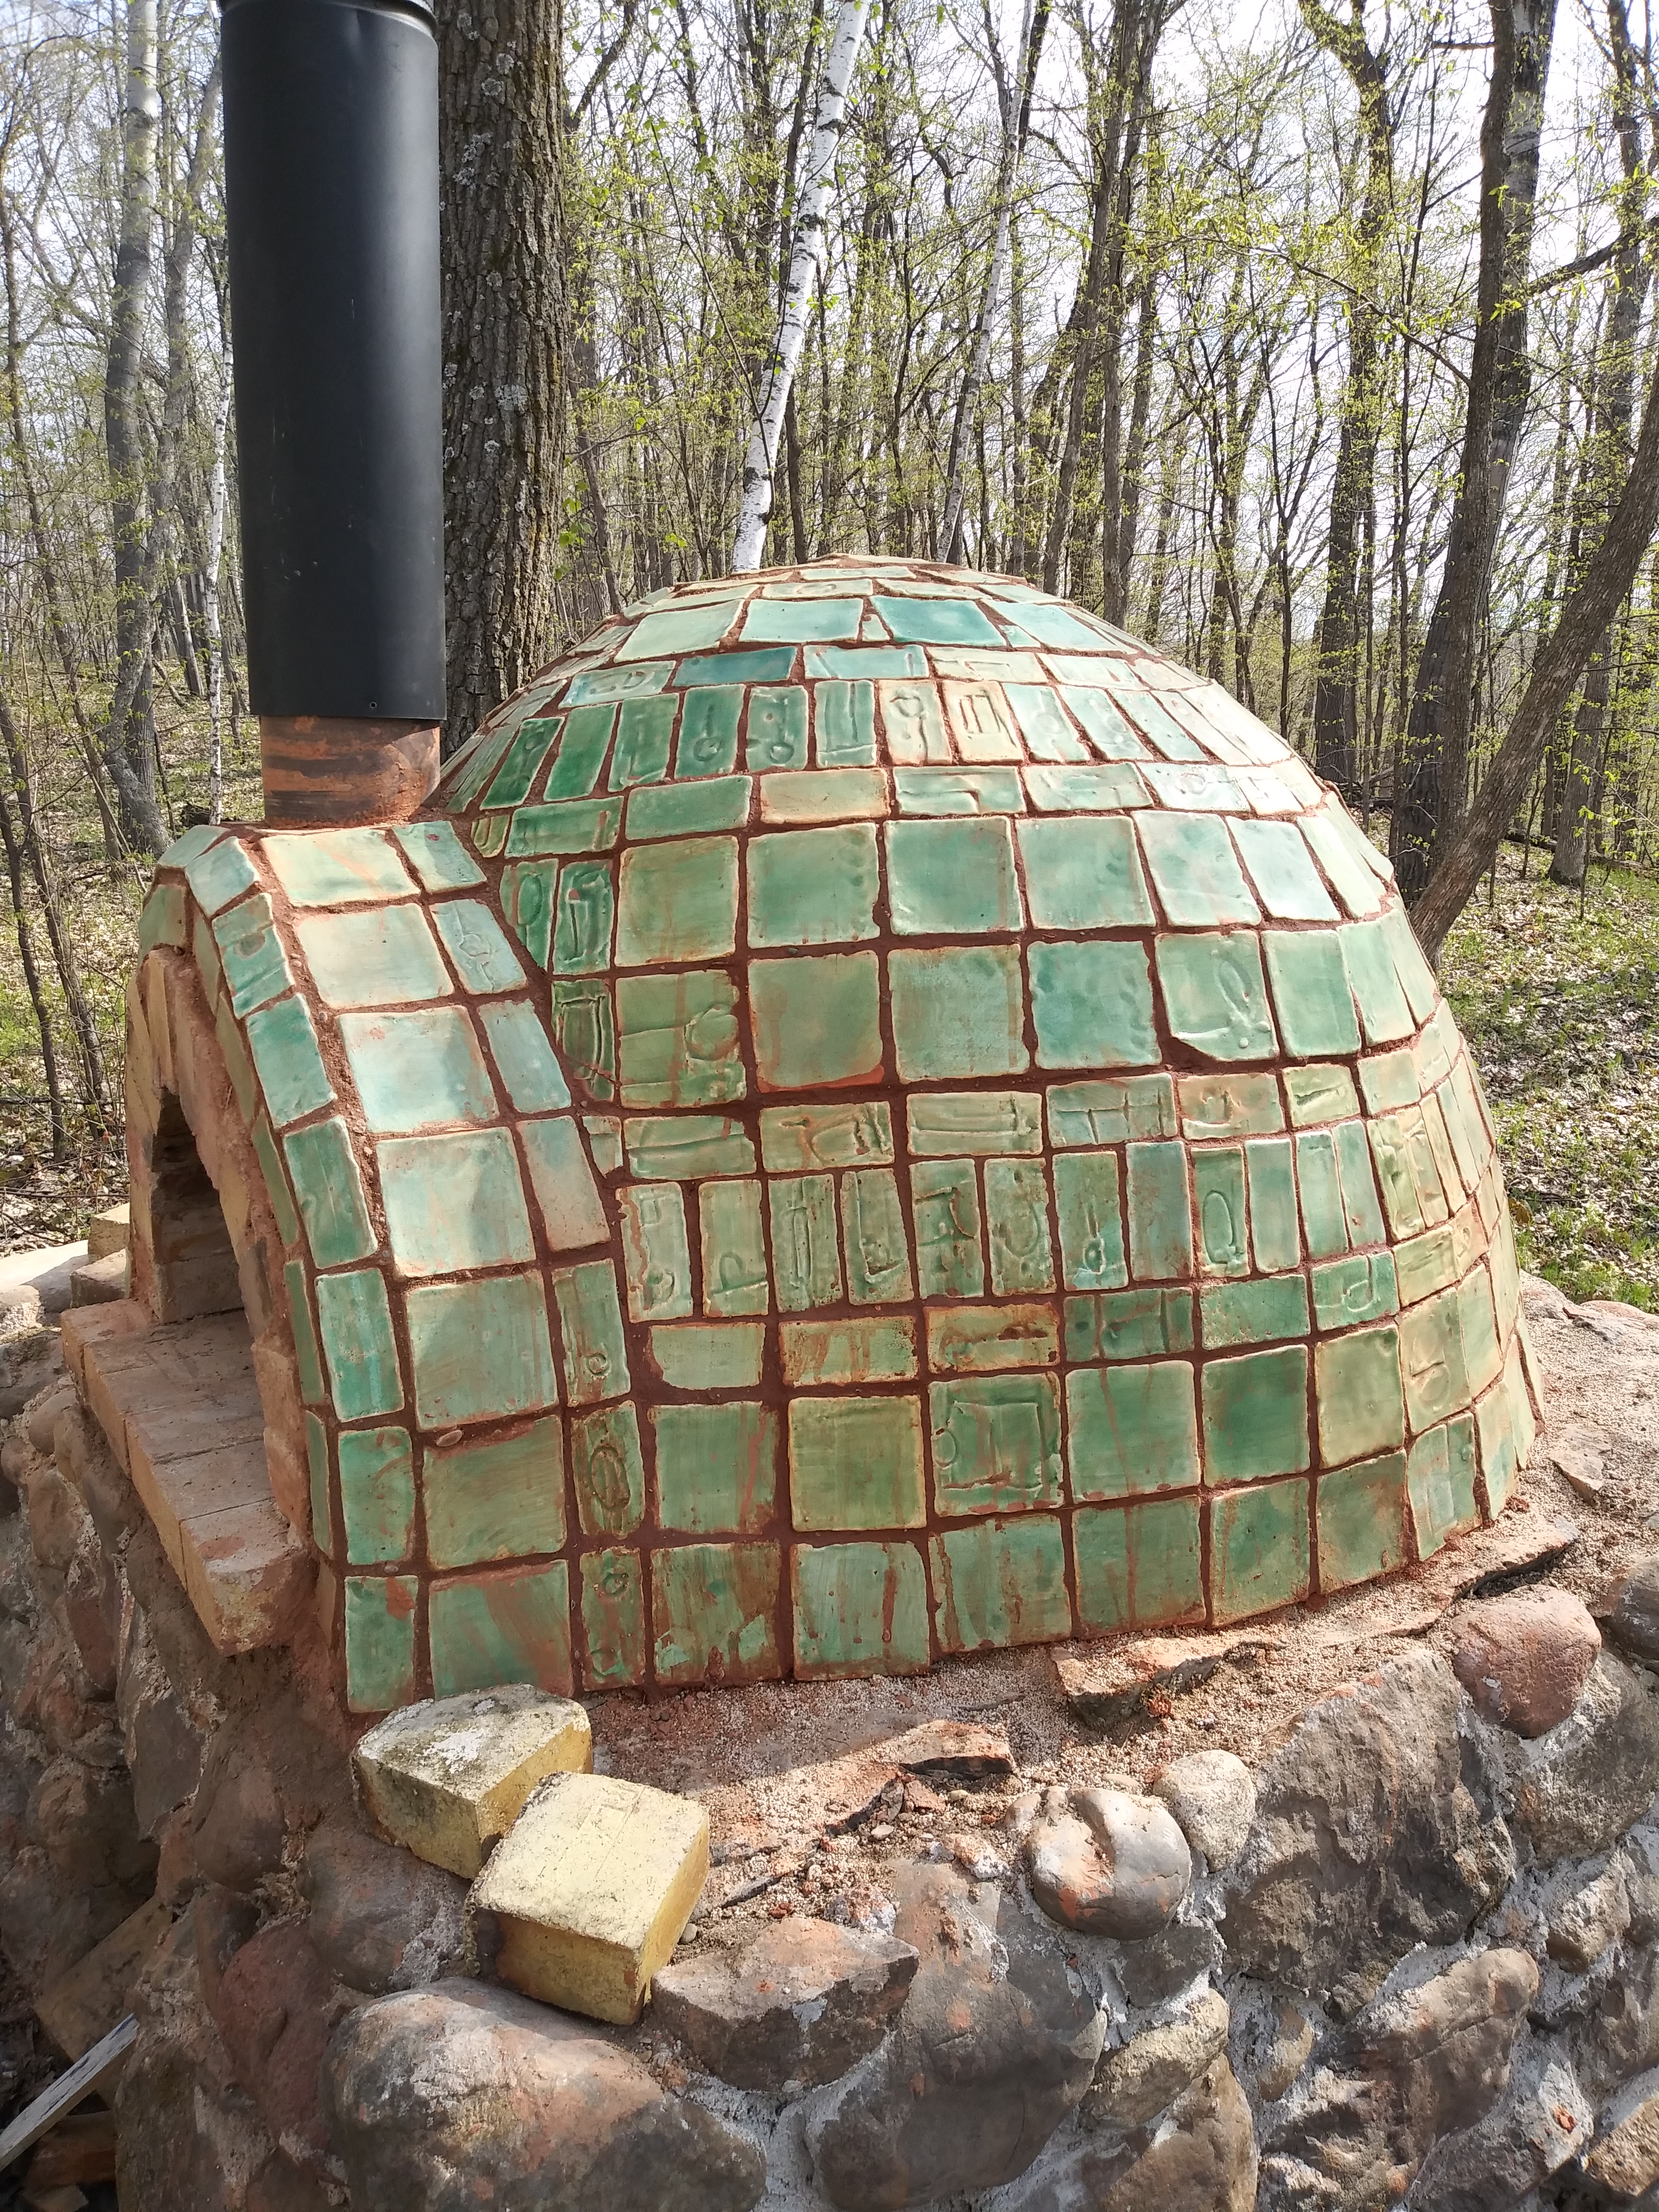
Finally, in the spring, it was time to build the oven. The inner shell is an igloo of firebrick held together with a mortar of sand and clay (a mixture of the silty clay we have underfoot around here and scrap clay from the studio). Surrounding that is an insulating layer of perlite, which we had left over from insulating the floor of our house, mixed with enough liquid clay to hold it together. The exterior shell is handmade tile grouted with dark clay. 

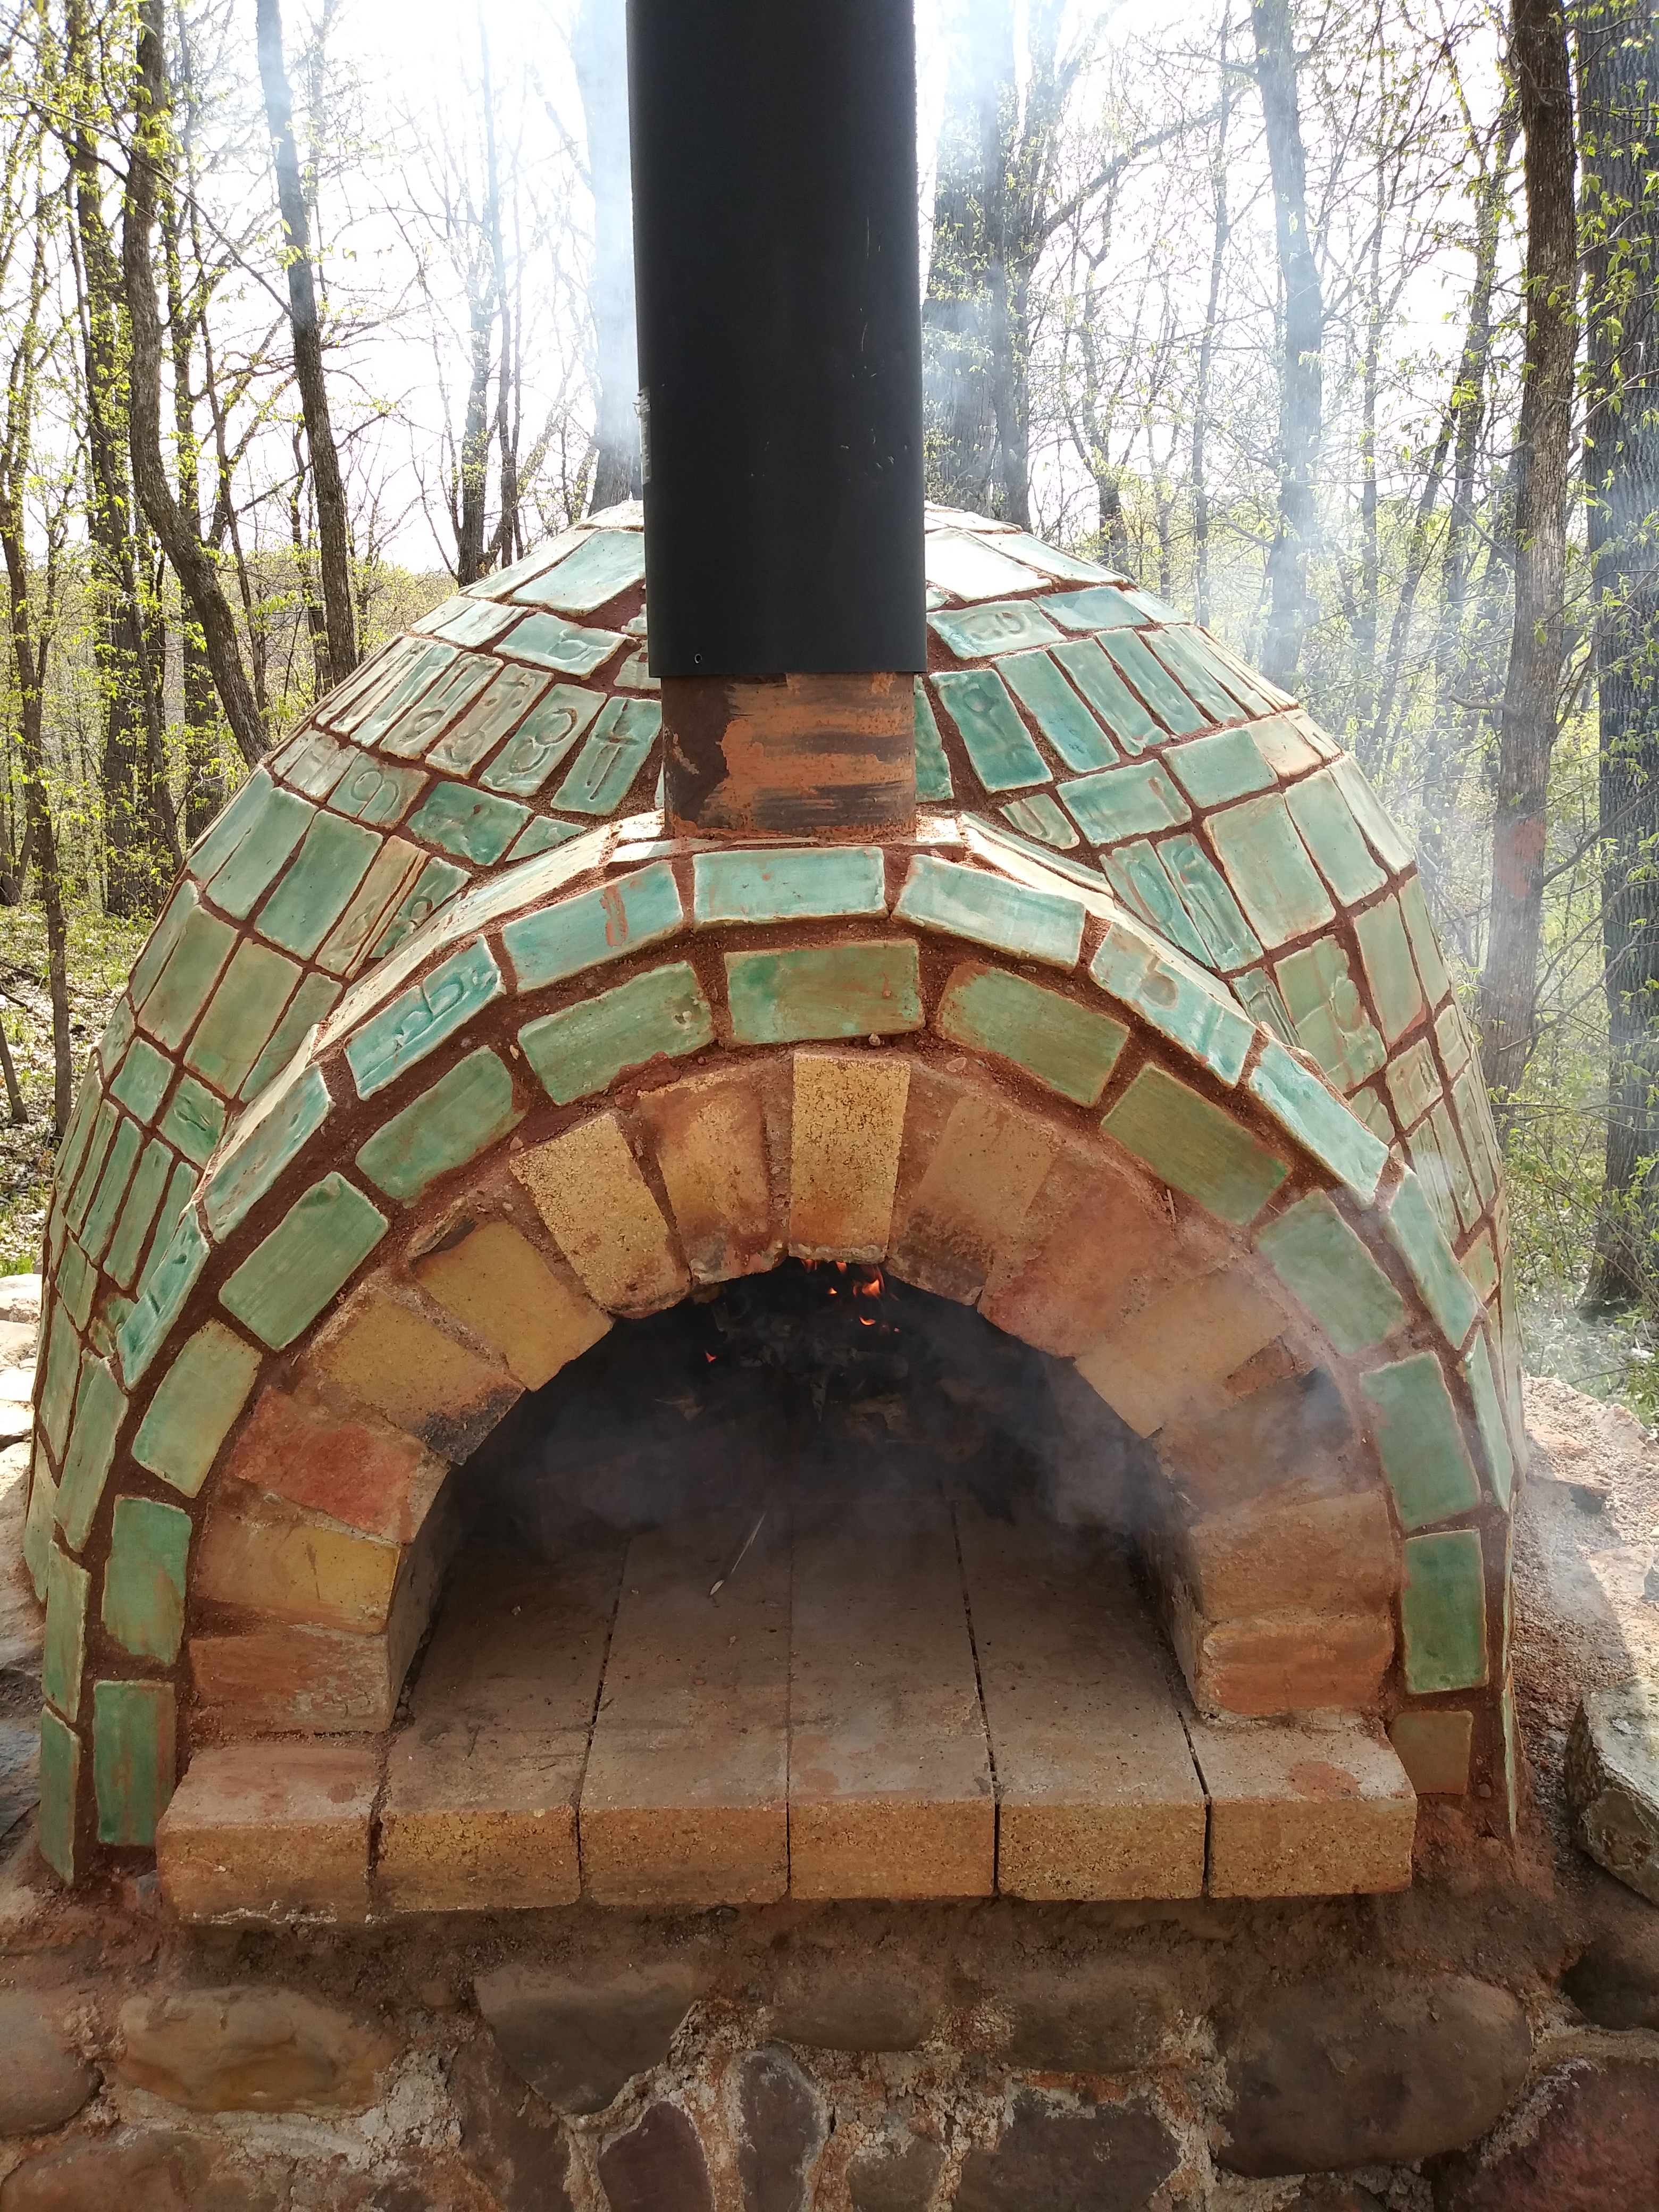
Sorry—I didn’t take any process pictures because my hands were too muddy. The arched stone chamber is for wood storage and in the photo on the far right you can see the first fire built on the floor of the oven.

It was a super fun project—I excel at building projects that don’t involve corners, or measuring, or any precision whatsoever. The kids helped out when they felt like getting dirty and I always enjoy jobs where I can work alongside my children. Plus, it ended with pizza, as all good projects should.

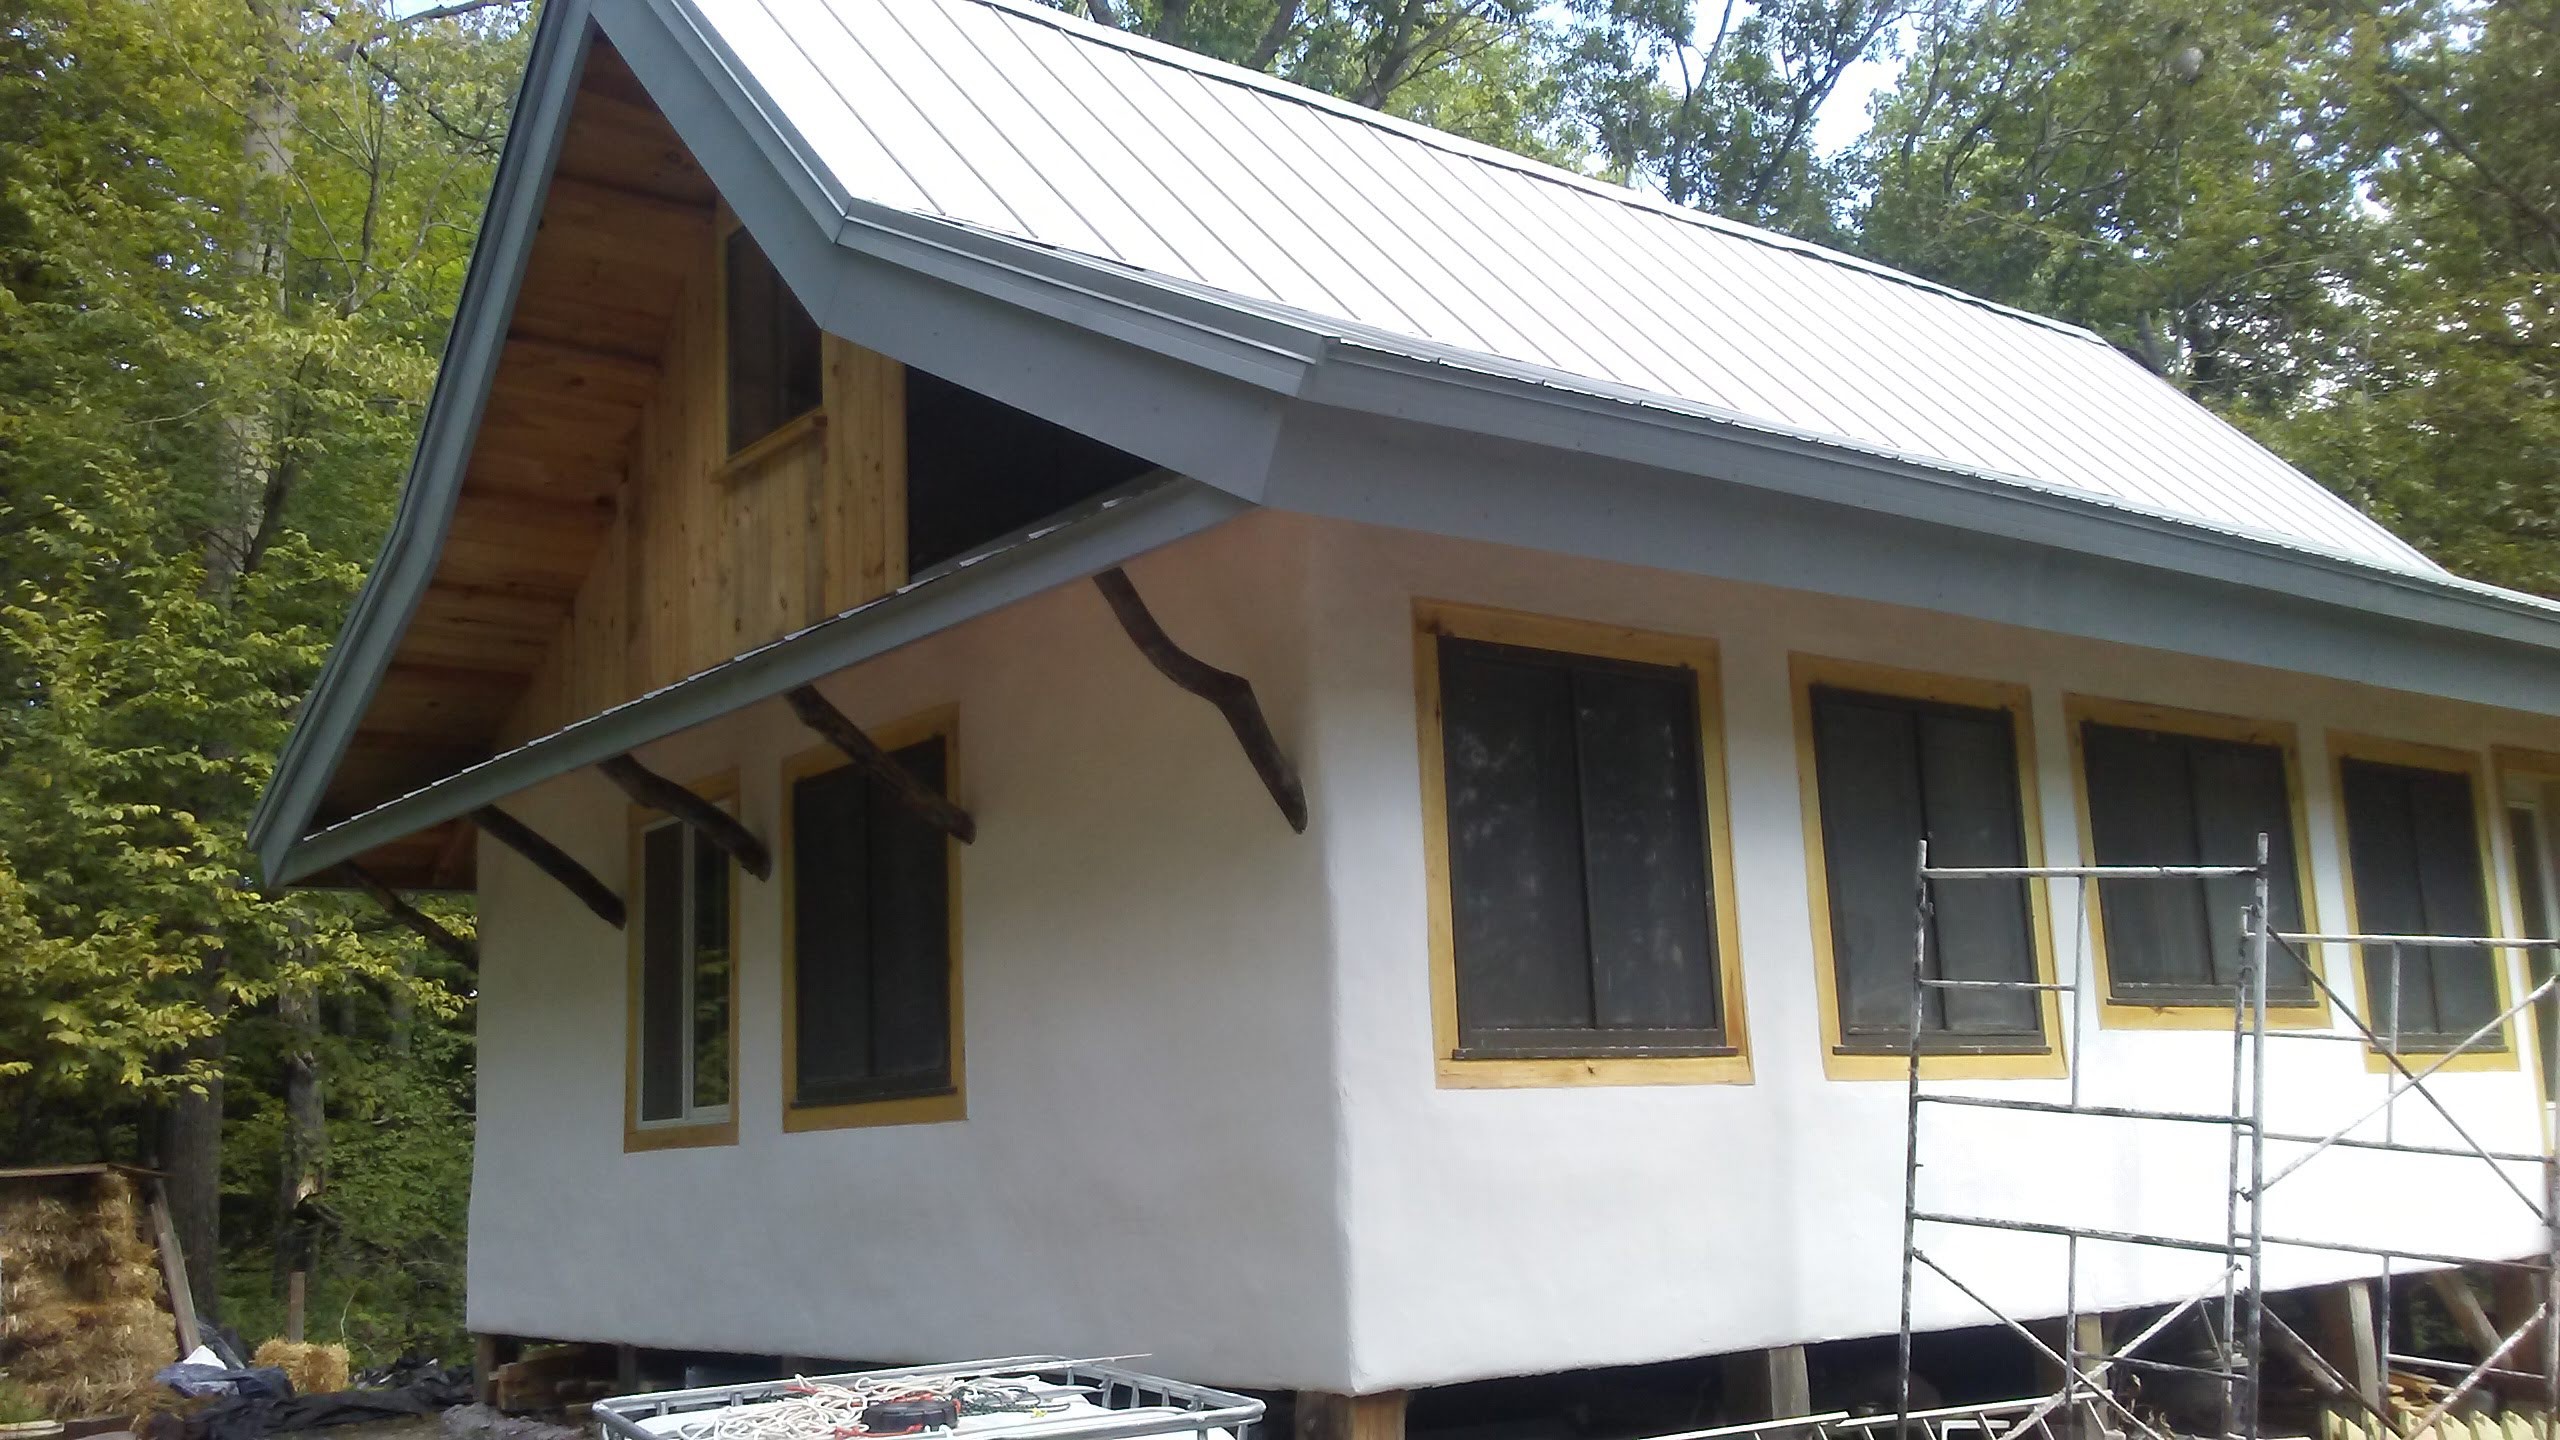
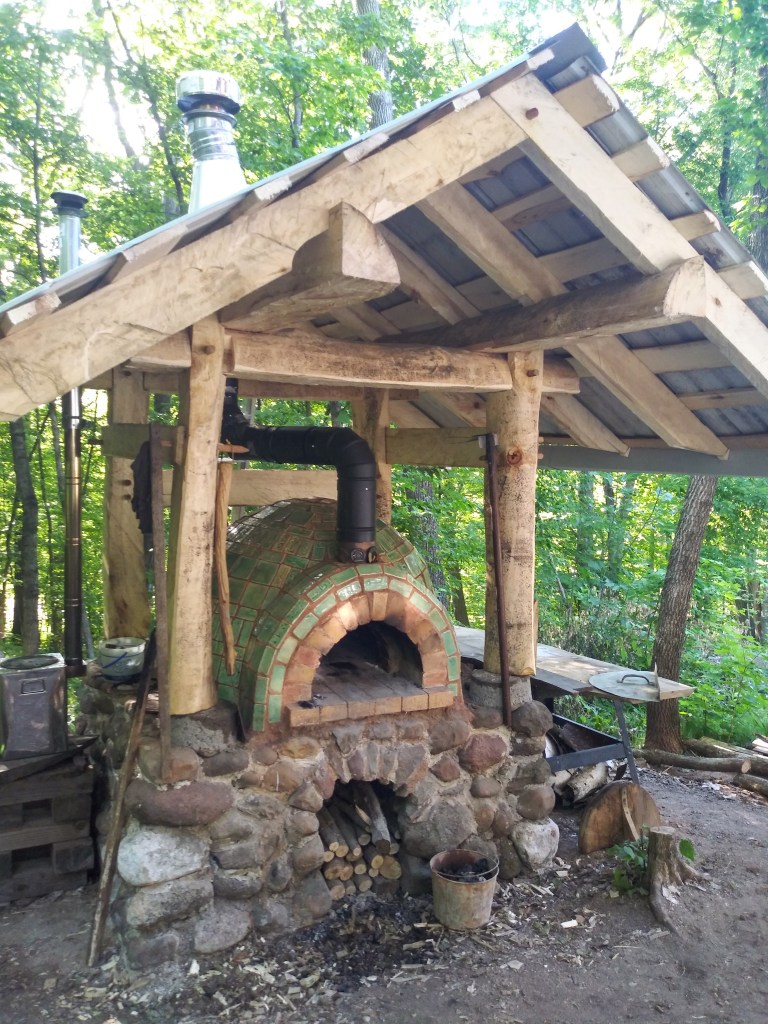
To keep the clay dry and ourselves dry when cooking has to happen in the rain, we needed a roof. Enter J. with another tree. He had recently cut down a giant aspen that was endangering our house; he quartered it lengthwise with his chainsaw and eyed the wood with a timberframer’s squint. Yep, it would be enough.

In the first week of summer vacation he cut himself a “quick” timberframe from that one tree, and one memorably buggy evening he and I wrestled that thing up over the dome of the pizza oven. He roofed it with salvaged metal and put a chimney through it—a Dr. Seuss kind of contraption which would prove the most expensive part of the whole kitchen.

Do you see the table on the right? That’s right…I finagled more counter space!

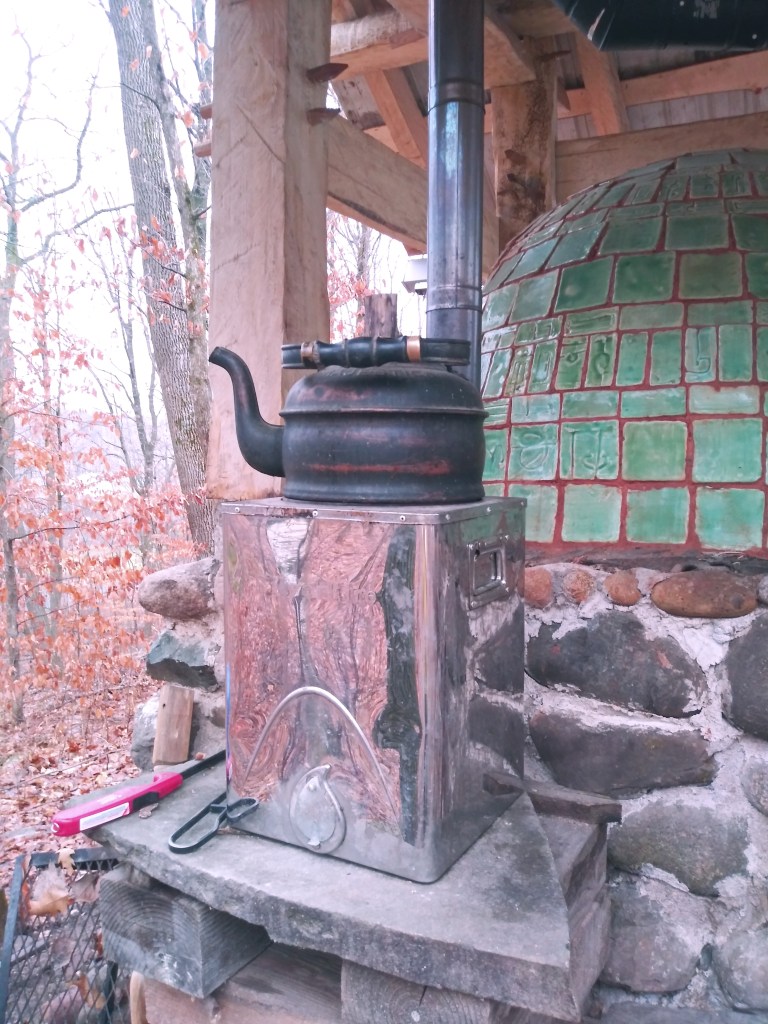
We still needed a cooktop. We had been limping along with a little camping stove fueled with sticks, and it did cook the food, but I was getting tired of choking on smoke and my hands and pots turning black with soot. J. found us a better stick stove, one with a chimney, which we immediately punched through our new pizza oven roof. It works really great—we can cook our meals on it and still have heat left over to heat a kettle of water for washing up. I even canned peaches on it last summer, but don’t ask me to do it again. 🙂

Like the old wood kitchen stoves, you can lift the burner cover off and stoke the silver box full of sticks, which burn for about an hour.

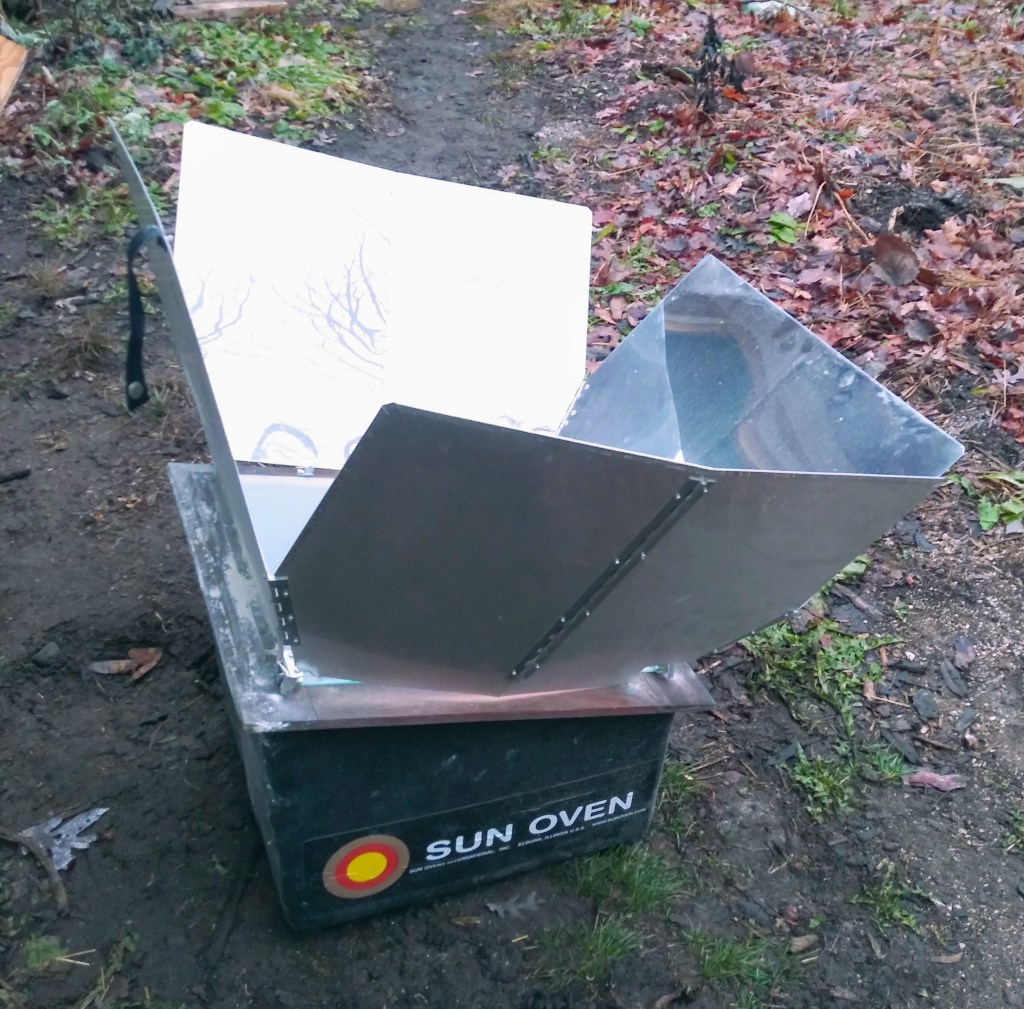
So now we have an arsenal of summer cooking options. A solar oven is great for baking and heating up leftovers on sunny days, and the go-to cooktop for most meals is the stick stove.

This is just a mock-up. You have to have sun for this oven to work.

And once a week in the summer we fire up the pizza oven—three or so hours of stoking wood on the brick hearth renders it hot enough for pizza, once we’ve scraped out the coals. As it slowly cools over the course of a day, we can bake bread, roast meat or vegetables, bake pie and granola, and then leave a pot of beans inside overnight. 

So, where a year ago our house didn’t have a kitchen, now it has two: one to keep our house warm, and one to keep it cool. Both are a joy to use, although the view from the summer kitchen, if I may say so, is especially terrific.

One Tree Kitchen

November 2020, but really December 2019).

Bathroom functional (by certain standards), check.

As I chopped vegetables on boards suspended between sawhorses and pulled utensils out of crates, the next emergency became the kitchen.

Pretty cluttered looking, huh?

We had renovated a house in the City when we were first married, so I’m no stranger to washing dishes in the bathtub or pulling out the plug of the circular saw to plug in the blender. But this was way more fun. Creating a kitchen from scratch—a low tech, high surface kitchen that would be the kitchen of my dreams…well, any amount of sweeping sawdust off the counters is worth that.

Yep, that’s my living room.

J. started with the cabinet for our beautiful kitchen sink, which we had found at a garage sale. The great thing about off-grid kitchen building is that it’s all carpentry, no plumbing or electrical. Any of those fancy bells and whistles we’ll retrofit later. For now, we’re keeping our old friend the bucket beneath the drain and a pitcher for water.

Before doors were installed.

Next J. set to work on the counter along the windowed wall, with its cabinets beneath. I wanted to be able to use the deep window wells above the straw bale walls to extend my counter space. This way we could have an expanse of counter space (so vast I could almost weep), while the shelves below are pretty shallow—a limitation I see as a positive, since I’m prone to losing things in the back tiers of cabinets. We designed the shelves in the cabinets to be the height of quart canning jars, three jars deep, so we can get a lot of those suckers in there.

The island was an afterthought, but I’m so glad it’s there, for extra counter space (happy sigh), storage below, and a place to sit and eat or work at the end. We created each drawer and cabinet with its future contents in mind, so that everything has a place out of sight and nothing has to sit on the counter. Can you tell I’ve been starved for counter space in my past?

I figure, in a kitchen where if you want water you have to haul it in and if you want something cooked you need to start a fire, observing luxuries like wide work spaces and copious natural light becomes important for the soul.

Let me at this point explicate the title of this post. Nearly all the kitchen carpentry done up to this point was done with wood from one tree. Let me just say that again. Almost all the wood for the kitchen came from one big white pine, a gift from my brother-in-law, who had milled up their yard tree. We had already used large slabs of the same tree to create the window seats throughout the house, but we had a lot of it left, so we put it to good use here. Besides the drawers, which are mostly oak and plywood, everything in those cabinets, even the shelves, is from that one giant tree. Thank you, big white pine.

My future kitchen, drying in my living room.

Finally, on the newly created bathroom wall we had room for shelves or cabinets. We opted for open shelves because I’m a potter and all our dishes are pretty; plus I love looking at stuff in jars. J. created drainage slots in the oak shelves so we could drip dry our dishes over the sink, and I peeled twigs from our black cherry coppice to serve as the upright supports. The diagonals brackets below are from a disturbingly large trunk of buckthorn.

Already moving in the maple syrup jars.

J. built the doors for the cabinets (we’re not the kind of homesteaders who have curtains on our cabinets), then he slathered all his work with a coat of tung oil, found some hinges and handles. I reveled in filling up the shelves.

J. is not a carpenter. He’s an artist who can figure out how to do anything. So the way he approached building our kitchen cabinets (something he, like you, perhaps, had never done before) was the way he approaches artwork. He starts with a drawing.

You labor over the drawing till you have it all figured out on paper, and then you start cutting wood. You put two pieces together, then step back and look at your work, then you do what has to be done next. In this way you feel your way forward until you end up with kitchen cabinets. Simple as that. (Wink, wink.)

An update on refrigeration: this fall we ditched our beer cooler and plugged in a refrigerator for the first time. J. found a company that makes DC refrigerators that run directly off solar panels, without running through a battery or convertor. In other words, it works while the sun is shining, and is extra insulated to keep food cold all night. J. hooked up a couple solar panels, ran the wiring, and next sunny day we heard the blissful, if foreign-sounding, hum of our food cooling. (It’s very quiet, doesn’t interfere with the sound of the birds outside.) We do keep jugs of ice on hand in case of many cloudy days in a row. But it’s doing its job well.

And what a luxury! To have a motor cool your food for you!

So here it is, a kitchen made from (nearly) one tree.

Notice: hot and cold running water!
Pretty awesome for not being a carpenter, huh?
This is our drinking water and tooth-brushing set-up. The blue barrel is full of water from the rain tank. Our family of 4 uses about 5 gallons of water per day, which, in our climate, is easily supplied by our rainfall.

What Can They Live Without?

November 2020.

It’s been a year since we moved into our little house in the woods. For you, I’m sure, as well as for us, this has been an interesting year of many changes. But let’s not think pandemicky thoughts—let’s go into the woods, shall we? We’ll breathe together the exhalations of the trees, feel the crunch of snow beneath our snowshoes, listen to the snowflakes settling into place on twig and moss and stone.

We moved to this beautiful place in nearly the darkest time of the year, before our house was…well, strictly speaking, “done.” But impatience to quit this four year long building project and commence real life in the woods had begun to override our prudence. So, one day last November, we packed up a bag of clothes for each of us, along with our mattresses, the Legos, and something to cook supper with, and hauled the works up the hill. In short, we declared ourselves moved in.

Already feeling homey.

After all, we had four hard-won walls, a roof, some doors, and heat—what else did we need? Let me see…

  • Water. That first winter, we hauled all our water up the hill from town in 5 gallon jugs. Once it snowed, using our children’s sled made this almost easy.
Here’s our plumbing system
  • A kitchen. Boards on sawhorses does NOT a kitchen make.
  • A bathroom. Like all civilized creatures we did our dirty work outside (in the outhouse).
  • Refrigeration. Optimistic efforts to use a cute but under-insulated antique icebox ended in failure. We fell back on the ol’ red and white Coleman, which we left outside most winter days and brought in on the coldest nights to keep it from turning into a freezer. When you live in a giant icebox (aka “Winter”), it makes a lot of sense to keep your food outside. 
Refrigeration, check.
  • Last thing our house lacked that most rational people call essential: Reliable lights. We had some tiny solar panels connected to a few LEDs. After cloudy days these would give up the ghost without a blink of warning, leaving us with a very dark night yawning before us. Some of those nights we slunk to town for a movie; sometimes we just went to bed early.

Still, it was the house of our dreams, in the blissful peace of the winter-slumbering woods, and (besides a blip in the first week when I pondered the very real possibility that this whole dream was a blunder of epic proportions and what we should be doing now was buying a loft in downtown Minneapolis which is where all the sane people are) we took to our new life like four little ducks to water.

The first project J. took on once we had settled in was an indoor bathroom. While I wanted to fully earn our homesteading credit by freezing our buns in the outhouse a little longer, J. had a little more compassion for our [whining] children. 

Our outhouse is a converted deer stand. Admittedly dilapidated.

Building interior walls in our house means, for J., building the 2×4 structure around the beams of the timberframe, and then meticulously scribing the boards of the panelling against the timbers and wavy walls. It took a lot of time but the result was well worth it.

Once he had finished the paneling, I started experimenting with online milk paint recipes. Eventually I concocted one I liked, made from simple, natural materials we had on hand, and one that nicely preserves the character of the wood while keeping the place bright. Because: tiny solar panels.

The laws of triage demand that you move on to the area of greatest need once stabilization has been achieved. So, once we got the walls up for the bathroom, we moved on to other pressing projects (namely, a kitchen). A year later, we have not yet finished the bathroom. This will happen in time, but for now we have what’s needed—a private place to use the compost toilet and to wash those parts of ourselves that most need cleaning.

Because that, after all, is what we’re doing here–stripping life down to its essentials: what’s important? what do we need? what’s best left behind when you step over the threshold of home? You’re welcome to ask those questions with me as we go.

Final Details!

October, 2019

What makes a house livable? What must be in place before you’d consider moving into a house? Window trim? Water coming out of the kitchen faucet? A kitchen faucet? A bathroom? Interior walls of any sort? I feel a bit crazy to say that none of this (besides the all-important window trim) do we have, and yet I’ve been excitedly making lists of what to bring with us on our soft move-in.

The fact is, we’ve been building this house for four years, dreaming it for six, and now that we have four finished walls and a roof, I’m dying to move the heck in, whatever the costs.

Long ago (at least two months now) we scraped and sanded all the woodwork to remove any splashes, drips, gobs, and errant brushstokes of lime and plaster. (See my previous post for an ominous warning to keep your woodwork clear of plaster: Whitewash and a Slide Show.) We scoured every inch of woodwork, from each ceiling joist to around every timber, cursing every clumsy splash made in our haste to slap on the plaster. Nevertheless all it took to clean up nearly all the wood was elbow grease and a veritable fleet of sanding implements. The only woodwork permanently scarred has been our beautiful home-grown oak baseboard, which we’ll stain dark, hopefully enough to cover all our indiscretions.

Next on the agenda, working downward from the ceilings, windows, and posts, was the floor. A daunting task. Three years ago, we installed our finish floor boards, rough-sawn at the local mill, before we  had even raised the frame of the house. Since then they had gotten wet and then dried so cupped that I sometimes tripped just walking across the floor; they had turned silver with age, and then were insulted in their old age with a generous splattering of plaster. All in all, they put the “rough” in “rough-sawn.”20190828_124544

It took some time behind the sander to fix them.

That may be an understatement. J. spent days behind a borrowed floor sander with the coarsest grit sandpaper he could find. Then passed the floor again with the next finer grit, then finer again. Back and forth, back and forth. First it looked tiger-striped, with fresh blond wood interspersed with the old silver/black/limey-white. With each pass of the sander, we wondered: is this good enough? How nice is nice enough for this house? In other words, how much of our lives (read: J.’s life) should we sacrifice to make this house beautiful? And if you know us by now, you know the answer to the last question: quite a bit.

20190930_142729-1
And here, looking down beside one of the posts, is where we decided to stop sanding. Leaving some of the scars left over from the cutting of the wood fits precisely with the aesthetic of the house. I also like how it tells a little of the story of the house’s construction. You can still see the weathering of the wood beneath its smoothened surface.

20190930_142627

We chose to finish the floor with Rubio Monocoat, a wax/linseed oil coating that leaves the wood feeling and looking like wood, instead of polyurethane, which feels like a coat of plastic. The downside of this beautiful surface is its slightly more complicated application. Although, true to its name, it only needs one coat, that one coat needs to be buffed on and the excess immediately buffed off.

So we rented a buffer. J. mixed the coating, thereby starting the stopwatch (the stuff needs to be applied six hours after being mixed).

And immediately discovered that our generator couldn’t power the buffer. So he returned it and went to a different store to rent a different brand.

Which also didn’t work.

Spurred on by the rapidly expiring drying time of the (expensive) floor coating, we found ourselves on hands and knees, a pair once again united by the need to accomplish an urgent task. J. scrubbed the coating into the floor; I crept after him with a towel, rubbing incessantly until the surface felt dry and slightly waxy. We recruited the children, who took turns rubbing gamely beside me, singing songs to pass the time, until finally, two knee-crushing and shoulder-aching days later, the floor was done.

20190930_142526
Jump-ropeable at last.

Floor, check.

Next up: since winter is coming on again, heat. This has been a very wet fall, so J. had to wait for a day that the roof was dry to clamber up and cut the hole for the chimney.

20191018_144851
J. admiring our new skylight.

20191028_141840
He installed a cathedral ceiling box to send the chimney through our roof.

20191020_175041

We bought this cute secondhand woodstove, hauled it up the hill, attached it to the chimney, and nearly burnt the house down with the first firing. Wait, that doesn’t sound right. Let me try again. WE NEARLY BURNT THE HOUSE DOWN WITH THE FIRST FIRING. Our house. That we’ve been spending the last four years building.

Here’s the story. We attached the chimney to the stove, then shimmied the stove around a little to get the chimney plumb, during which two chimney pieces near the ceiling silently disassembled themselves. So when we started the fire, 16 feet of chimney were cantilevered above the stove by 3 screws, with a one inch gap between the two unattached sections.

20191020_164240
Lighting the bad-luck stove.

J., thankfully much more vigilant than I, caught the problem before leaving for the night and shored up the chimney, then built a much more stable version the next day.

Unfortunately, over the next few days as we lit more fires in the little stove, we discovered that we had bought the wrong stove. Mostly because we had been planning to cook our meals on it for the next year, and the thing wouldn’t boil a pot of soup. Cute it was, but we at The Clay Life expect our cute things to work for their livings. In the parlance of ceramics, we say “form and function.” In permaculture, we call it “stacking functions.” At The Clay Life we say “Heat the house, cook and bake, heat water, and look good while doing it or you’re out of here!”

So we went back to Craigslist the next day after the failed soup experiment, and lit immediately upon our stove at the end of the rainbow. Our pot-of-gold stove. Although it cost about half a pot of gold and weighs maybe two pots of gold, we think it’ll be worth it. It’s called the Vermont Bun Burner, and it’s a woodstove with a bake oven below it, all wrapped with soapstone, which gives a nice even heat once it warms up. It’s already plumbed to heat water once we get to it, and you can cook right on the top.

20191028_141920.jpg
And she looks good too.

20191028_142134

So what’s next? Water? Interior walls? Electricity? Kitchen? Loft space?

Why, moving in, of course.


Whitewash and a Slide Show

August, 2019

Even before we were done plastering, we began to whitewash our walls. Whitewash is the simplest paint ever–lime and water, mixed. You can add colorant (but that would make it not-whitewash, wouldn’t it? And in our shaded, woodsy, non-electric house we need all the brightness and light reflection we can get). You can add other ingredients, like linseed oil or quark (but these days we need all the simplicity we can get too). So for us, mixing more paint was as simple as going to the barrel of lime soaking in water, scooping some out, and whisking water in until it looked like paint.

20190813_095232

Here in Wisconsin we’re familiar with limewash/whitewash because they used to paint barn interiors with the stuff, but it’s infamous here for its powdery, flaky texture. That’s because it doesn’t adhere well to wood. However, when painted over lime plaster, limewash cures into a tough, stone-like surface similar to its parent material, limestone.

We painted the limewash right onto wet plaster, the day after each wall received its final coat of plaster. The fresh limewash on top of the wet wall helps each component dry slower, curing harder.

20190810_142307
Here it got really fun. You can see how just the first coat brightened up the house.

We painted on layer after transparent layer until we ended up with three coats of limewash, inside and out, which added up to a nice opaque white. It has quite a dry surface, similar to the “matte” paint you can get at the store, but more so. I imagine it’ll scuff easily, so I plan on keeping a bucket of limewash under the sink for easy touch-ups. It keeps indefinitely.

OK, let’s do the slideshow here, because in the last blog entry I had exactly zero pictures of the finished walls, and you’ve been waiting so patiently.

20190813_095306
The whitewash did seem to highlight the imperfections of our plastering job. On the bright side, future patch jobs will be less obvious in our already imperfect wall.


20190813_095146
Pardon the mess in these pictures–the house is still very much a work zone, not a magazine centerfold. 

20190828_124641
I scraped and sanded the door, stained it dark, and now it looks real neat (in the local parlance).

20190813_095126.jpg

20190813_095211
Kitchen, showing backsplash tiles. I grouted them with a mixture of fine sand and lime putty, which works well except that I didn’t clean them off quick enough and now I’m having to scrub them individually with a wire brush. 

20190813_094955

20190813_094948

20190813_094931.jpg

Now for the outside:

20190828_124902

20190828_125103

A word of caution about limewash and lime plaster–it stains wood. We had read this but let our dropcloths lapse in places, figuring a little scraping would cure all. This was true for aspen, from which the lime scraped easily and completely, but less so for pine, which took some persistent sanding to erase deeper stains. Most affected by the lime was our oak baseboard, which turned black where the lime soaked in. Sanding it has been onerous, and the stains seem to go deeper than we can sand. We’ll probably end up applying a dark stain, but we’re not sure how well it will cover up the lime spots.

So. I know it’s been said before, but it bears repeating: keep your wood dry.

And that’s as good a way as any to end this post.


%d bloggers like this: