Racing Old Man Winter

November, 2017

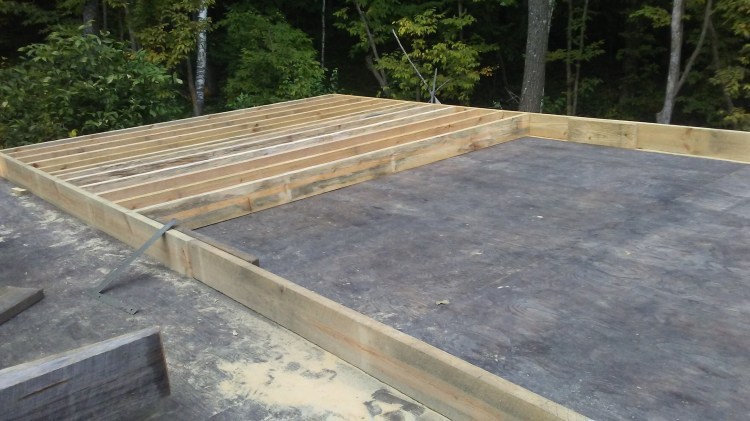
The heady glow from our house-raising faded quickly, as two inches of rain fell the next day on our lovely, unroofed house with a very vulnerable floor. J. quickly developed a nasty habit of pacing the floor at home as rain fell; he was worried both for the oak flooring we’d laid down and the insulation beneath it.

20171008_145241.jpg
There it sits in the fall woodland, in all its quiet glory, but suffering the indignity of having its floor covered with tarps.

We weren’t immediately roofing the structure because there were more rafters to be built. And wall structure to be built before we could put rafters on them.

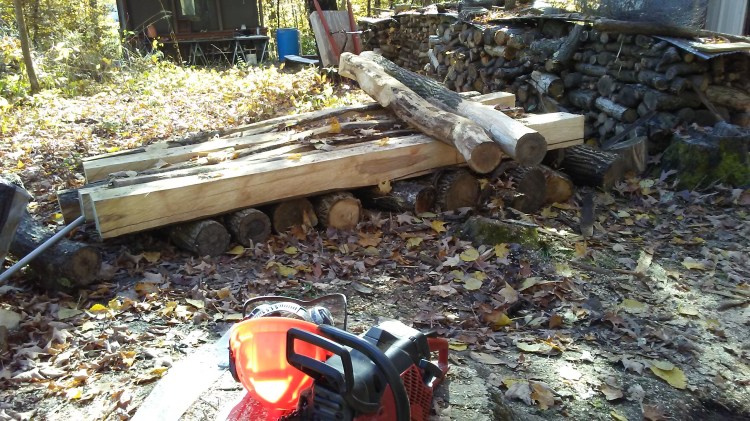
And of course, idealist that I am, while J. was counting up the list of lumber he would need to buy for the next phase of our project, I looked around at all the logs laying around our clearing–twisted rejects or too-short chunks–and figured we could find a use for them. I lobbied J. to save a little money by spending a little more time (which we both knew we didn’t have) to just quick mill some of those up. To my surprise, he bought my argument and got right to it.

20171016_115711.jpg
Here we have a few milled logs and a few yet to be milled. Some we peeled and left partly round. By the way, “to just quick mill those up” was a fiction. It took two days of rough work with a chainsaw to square the 18 logs we needed.

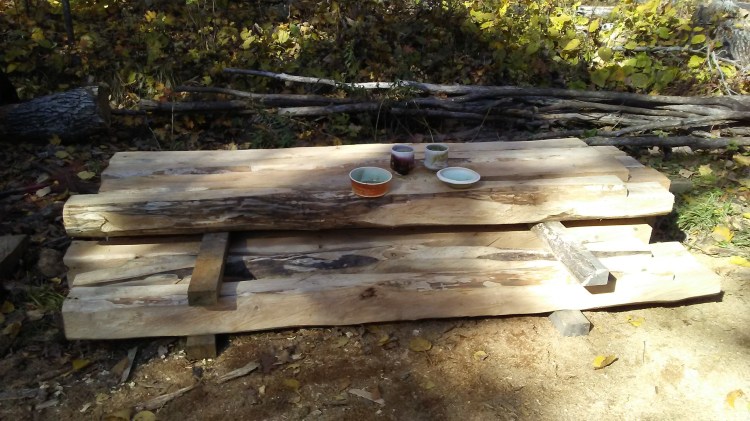
Let me interject again what a thrill it is to produce something you need with your own two hands (or your husband’s). If you ever have a chance to do that, either in the kitchen, out of your garden or yard, or in a workshop, by all means, do it. Even if it takes a whole year to produce, say, a mushroom, it’s still your mushroom, and you grew it, and you could grow more now that you know how. And your family will eat it, and they’ll like it, those ungrateful wretches.

Anyway, there’s nothing like it.

20171016_115630.jpg
Incidentally, the logs also made a sturdy picnic table for our work-breaks.

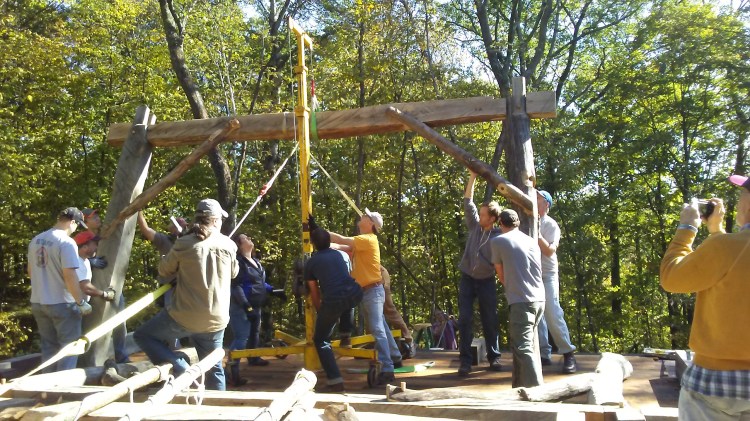
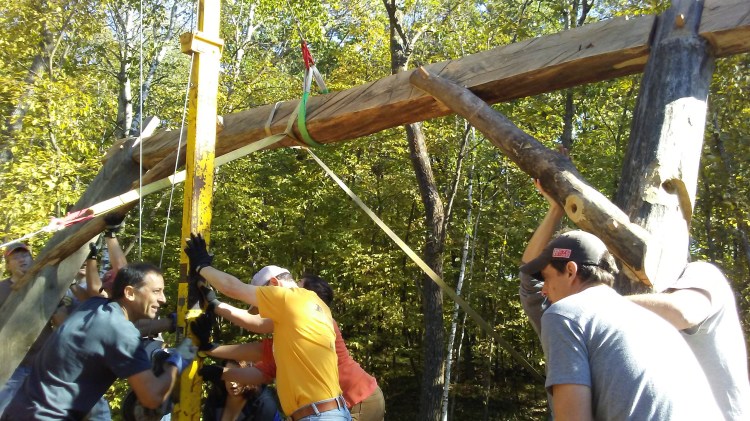
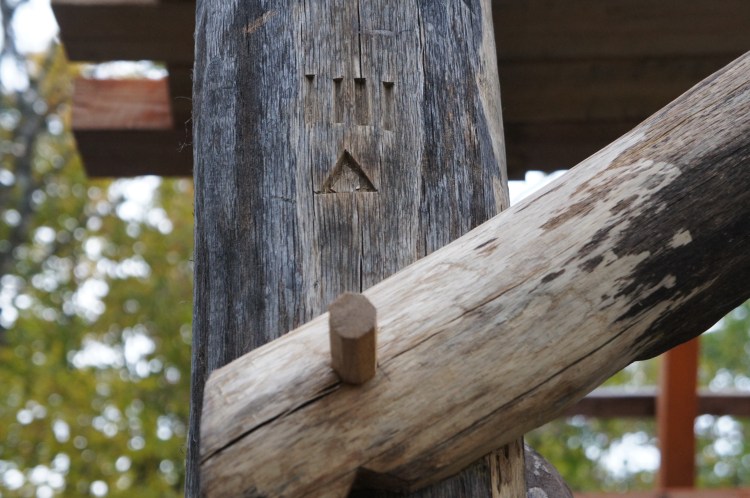
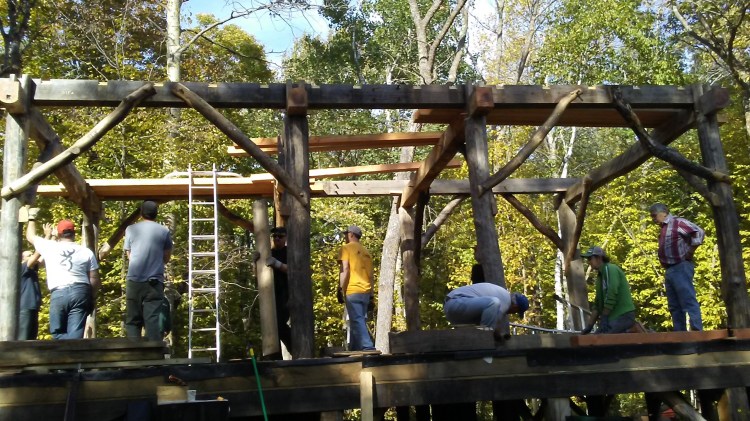
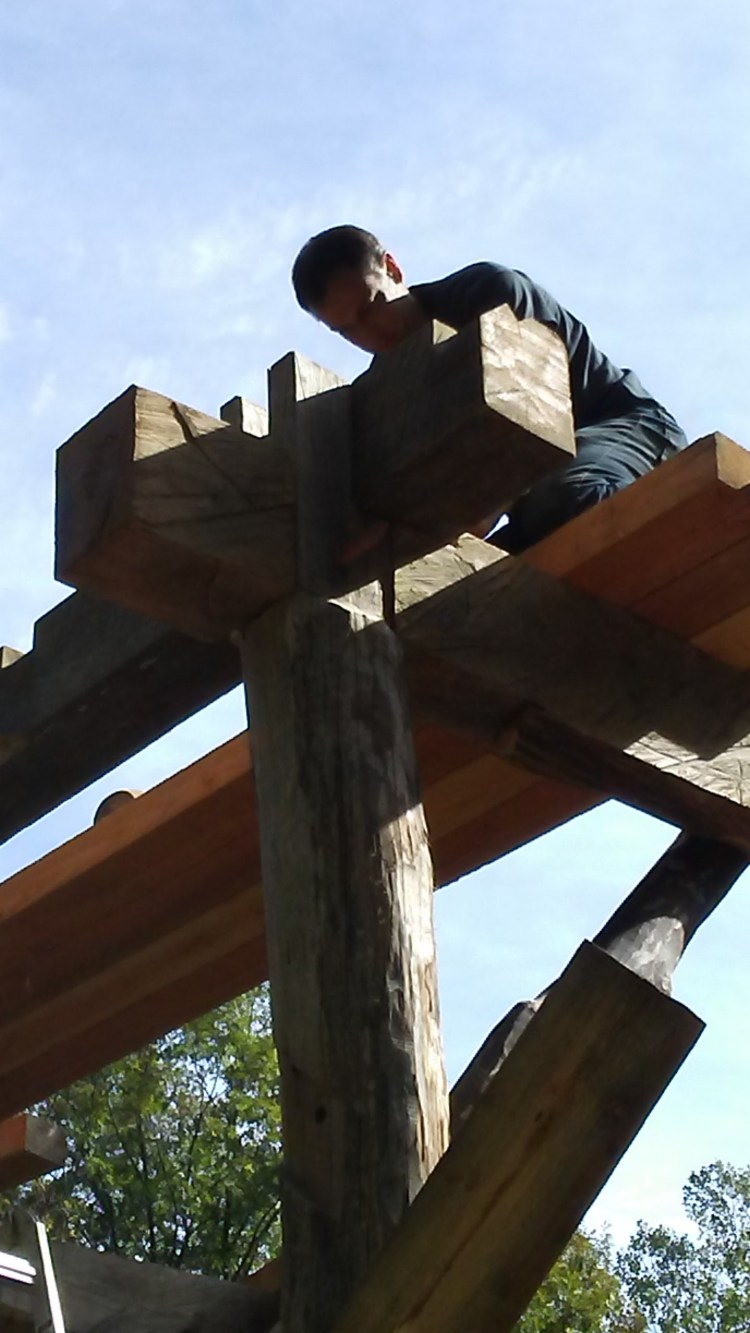
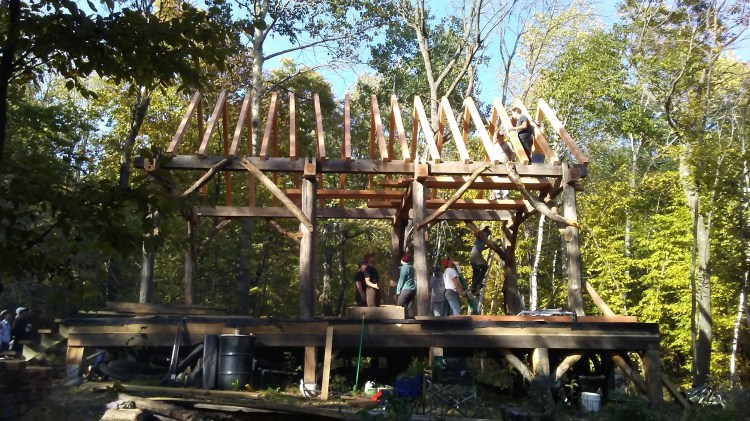
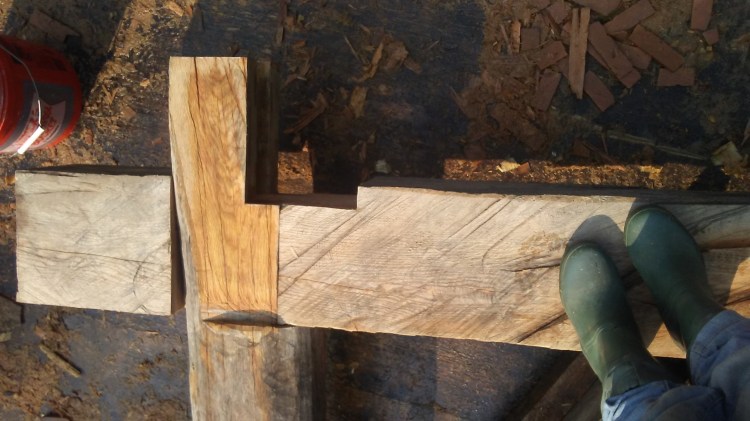
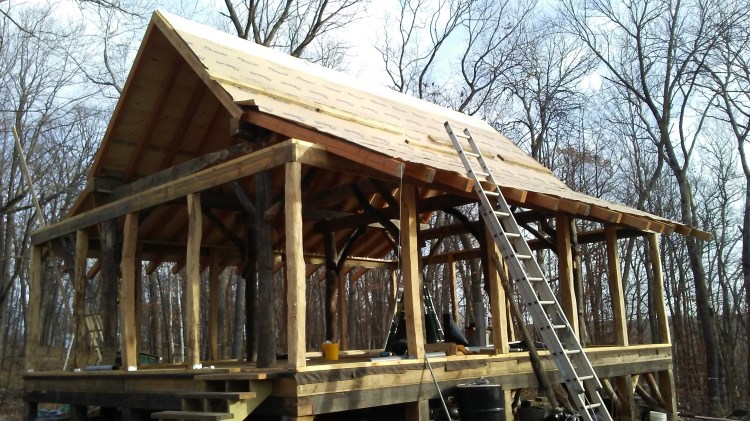
As shown above, J. notched one end of each log to accept the horizontal top plate. Since these logs will be inside the walls and nobody will ever see them, we were concerned less with precise carpentry and more with speed. So we hacked in the notches and started tipping the logs up to form the exterior wall structure of our house.

20171020_172828.jpg

20171020_172846

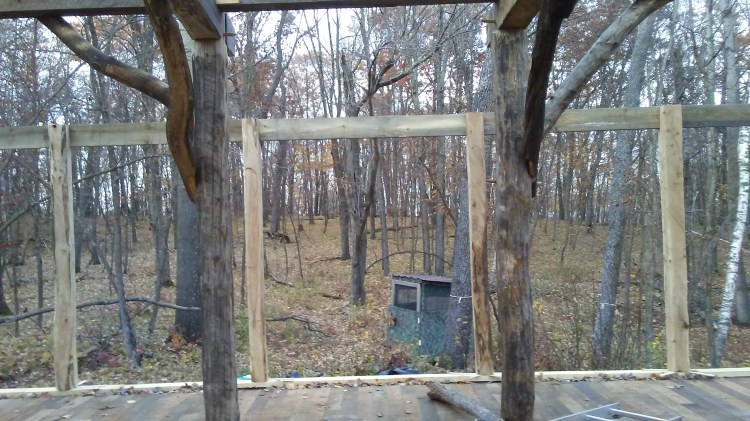
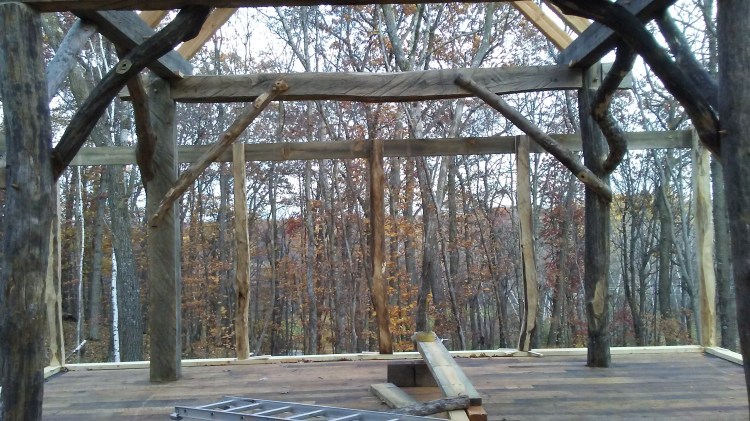
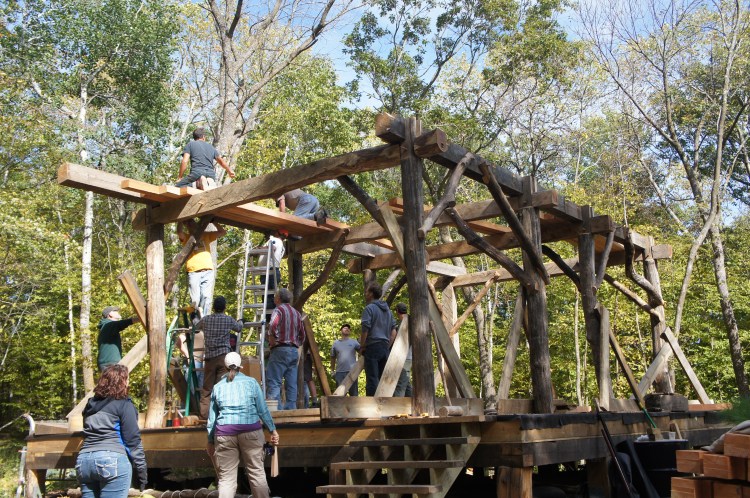
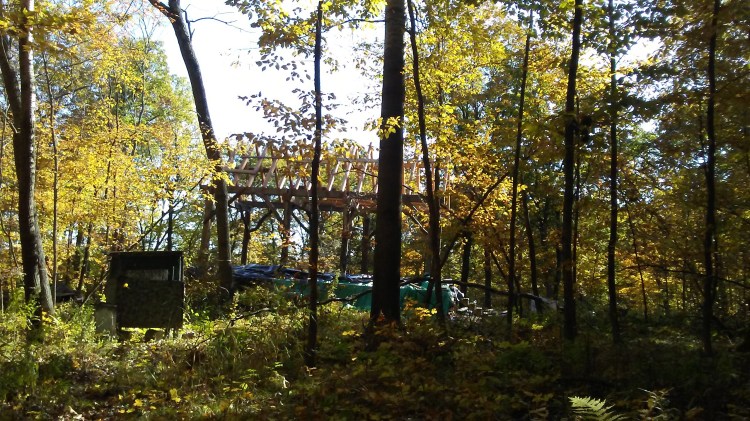
So you can finally see the skeleton of the entire house. The timber frame sits inside the exterior walls (which eventually will be bricked up with straw bales).

Also evident from the photos should be the passing of time: the golden warmth of September has faded into the dim, colorless chill of the wettest, coldest fall in a decade. We quickly gave up on the tarps, which just leaked rainwater between their seams, and dedicated ourselves instead to hours with the Shopvac in an attempt to keep the rain from seeping too much into our floor. Yes, we did that.

20171020_172810
A view of the gallery between timber frame and exterior wall.
20171020_180117
In fact, this particular spot will become our dining room, so we took the chance to have our first meal there.
20171023_092114.jpg
Hmm…the light is starting to feel a little like winter light. Also the days are getting shorter…

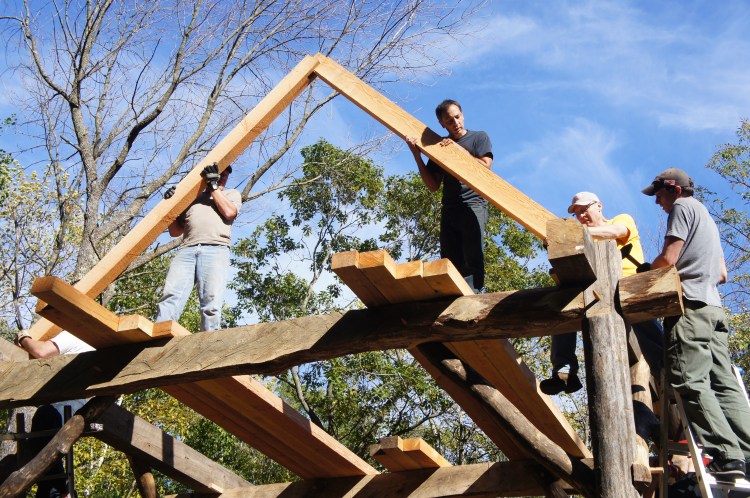
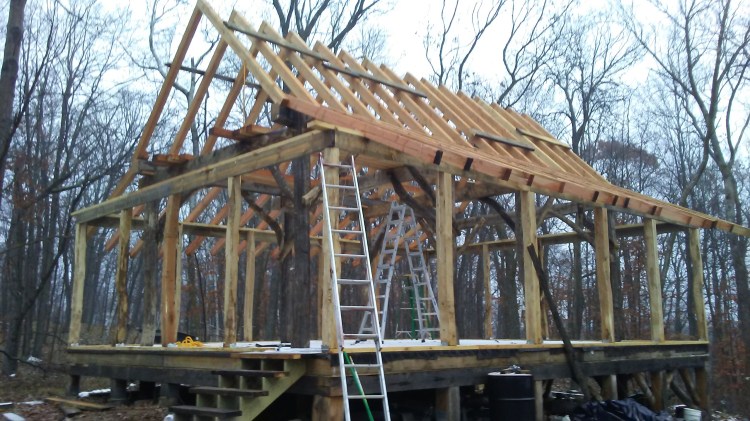
We began cutting the birdsmouths for the second tier of rafters. As a team, J., his dad, and I got quite a few cut and in place in one day.

20171023_140630.jpg

20171023_133237.jpg

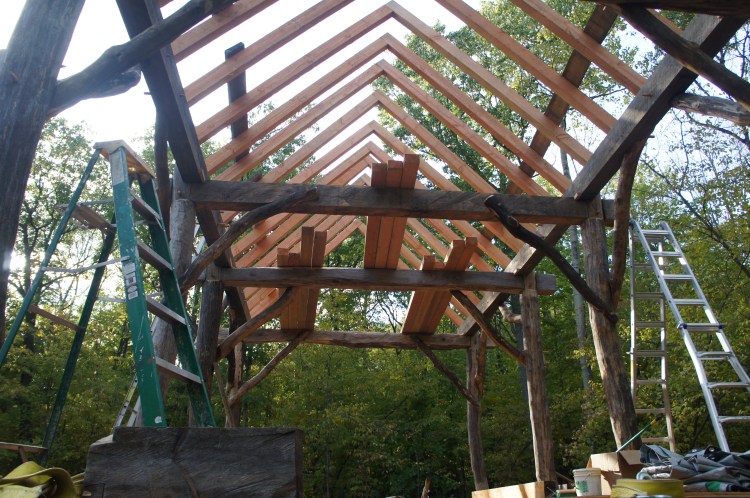
As that second tier started to go up, it began to look even more like a real house.

20171023_133116

And then this happened…20171102_095630

As I shoveled out my kitchen, the friendly race with “Old Man Winter” started to feel  more like the hounds of hell breathing hot down our backs. Only in a very cold way.

We put on more layers and kept working…

20171102_094107.jpg

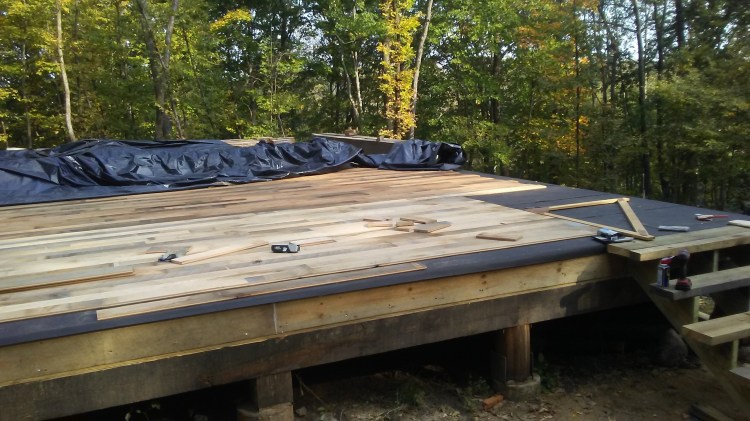
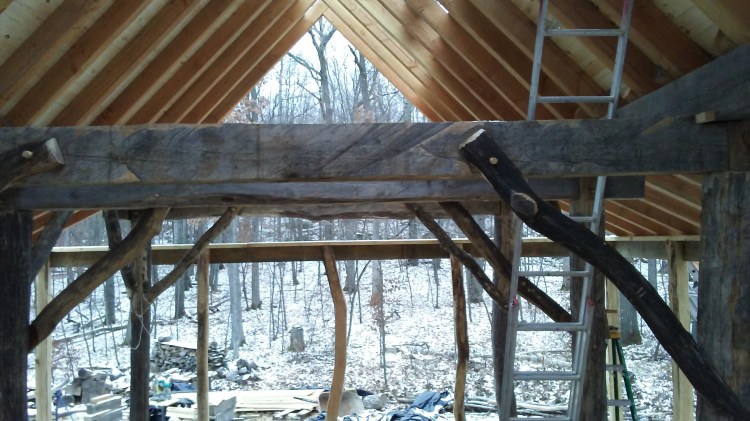
Finally all the rafters were up and we began putting up the planking of the roof. These are 6″ pine planks we had milled by the local mill into tongue and groove boards–we wanted them to look nice since they’ll also be our ceiling.

20171103_145651

20171103_145716

Each board that went up felt good, offering a little more protection from the coming winter. The work, however, went slowly. Each board had to be measured and cut to fit, and the snow and ice made things a little treacherous. No good having a house in the woods if your husband has a broken neck. J., prudently as usual, bought a harness and attached himself to the ridge while I cut the planks on the ground and handed them up.

20171106_120746

20171106_134437
In one of the planks I discovered the intact nest of a potter wasp. This I considered good luck.
20171110_144323
Another snow and the roof is nearly closed.
20171120_091541.jpg
And there it is… Even the sun came out to appreciate our work.

J. immediately began nailing on a layer of synthetic tar-paper, the last layer to go on before winter. We were feeling optimistic about our progress when, halfway through putting the paper up, J. came home with a fever of 102. He laid around for about a week with influenza. Which set back our plans a little.

Remember how I complained a lot about August…all those mosquitoes and that heat and humidity? Why did I do that when I should have stored it all up for November?! When you have on so many layers your arms don’t rest at your sides…they kind of stick out at a 45 degree angle? When you have to use the one-fingered-nose-blow (otherwise known as the farmer blow, the Nordic blow, the lumberjack blow) so much the ground underfoot gets a little slippery? When every week brings on a new virus? Oh well, I used up all my complaints for the year in August.

20171120_091245.jpg
Here we are, grinning in spite of ourselves. Our work clothes have changed since August. Heck, even since the beginning of this blog post!

I have to fall back on that old North Woods saw, saved for those special times when your boogers freeze and the wind brings tears to your eyes: “Least there’s no bugs, eh!”

20171102_090106
Postscript: Tip your hat to these old friends. After tramping with me through Italy and Japan, the labor of one of our children, and half a house, I finally had to bid them a fond farewell. Rest in peace, good soldiers.

Pour-over coffee mugs

November 2017

I know you’re waiting with baited breath to hear about the progress we’ve made on our house since the grand frame-raising in September, but that’s not in the cards for this post. Movement on that front has stalled just a bit, so you’ll have to wait just a bit for an update. Hint: the reason includes influenza, pinkeye, and the wettest, coldest fall in a decade.

Between days of work on the house, I’ve been putting in my time in the studio. Since the last post from the Firehouse Studio, the place has become a fully functional work space, although not yet open to the public except by appointment.

Today I’m finishing some mugs I started yesterday on the old Lockerbie kick wheel.

20171117_115219

It’s such a thrill to work on the kick wheel, and you should not be surprised by this, because as a non-electric tool, it gladdens my little Luddite heart. All the power for turning the wheel comes from my right leg which kicks the heavy flywheel, producing a slower, more irregular motion (and, eventually, an enormous right thigh). When I use a kick wheel instead of an electric wheel, the pots I make reflect the irregular motion of my foot; they are looser and less perfectly round, full of the gesture of throwing.

20171117_105111

They remind me of the reason I make pots in the first place, which is to create something made by the hand, for the hand–a revolutionary action in today’s society of data and dollars. These pots, full of my fingerprints, the gesture of my hand and foot, and alive with the flame of stoked wood, feel real in a way that machine-made objects never can.20171117_105034

But back out of the clouds. Today I’m making handles, made from coils of clay attached to the thrown mugs and pulled into shape by wet hands.

20171117_095856

Making a handle is good practice for the rest of life. It involves finding a balancing point between two extremes: elegance vs. comfort, sloppy vs. clean, form vs. function, sturdy vs. delicate.

A challenge with handles is to make them to match the character and personality of the rest of the pot. I also like handles that look like they grew organically out of the pot, instead of manufactured separate from the pot and glued on.

And a final rule for handles: Do not putz! It’s possible to waste a lot of time smoothing, adjusting, pushing, pulling, and the handle almost never looks better for it. If you fail the first time, better to cut the handle off and start over. This rule also works with child-rearing.

Just kidding.

20171117_104710

I’m never quite happy with the handles I eventually make, which is good, because it gives me something to shoot for next time. Although these ones, I think, are pretty good.

So the mugs are made, now for the pour-over filter cups. These are a (non-electric!) way to make an individual cup of coffee. You put a paper filter with coffee grounds in the cup, pour boiling water in, and the coffee drips slowly through a hole in the bottom of the cup, into your waiting mug below. Hooray! Coffee!

I threw these on the Lockerbie yesterday:

20171117_100754

Now that they’re leather-hard today, I flip them over, throw little coils on their bottoms to be foot rims, and cut the drip hole:

20171117_101544

Another set of handles, and voila! Pour-over coffee mugs!

20171117_113158

The House-Raising

Sept. 30, 2017

The day dawned bright and clear, the exact day I had imagined when we first said the words “house-raising” to each other.

The day before, I had joined J. in the woods for the final preparations. In short, we had to reconstruct the four “bents” from the timbers lying like pickup-sticks all over the platform. The bents are the square arches that make up our house, each of them two vertical posts with a horizontal tie beam to connect them. We got out our collection of hand made pegs–these J. had made from dry hardwood, the theory being that if you pound dry pegs into green timbers, as the wood of the timbers dries it will shrink around the pegs and, to use the marriage analogy, become one flesh.

20170929_105148

The sound these pegs make as they are pounded into the holes in the timbers is a treat to hear. It starts with a low thump and with each strike of the mallet the sound gets higher and higher, like plunking out a scale on a piano, until the peg is through. In the clear autumn air it seemed to reverberate for miles.

So back to the day dawning bright and clear, a miracle in itself…a sunny window between rainy days. Our friends and family started showing up early. The first ones assembled the roustabout, a winch/mini crane originally used for raising circus tents (like them, we had previously gotten rid of our elephants). J. acquired it in case we didn’t have enough labor, and turns out, if the timbers were made of pine, we would have had enough collective strength. But not oak. They’re seriously heavy. I think everyone involved was thankful for that roustabout by the end of the day.

20170930_105734 (1)
The first bent on its way up.

Forgive me for waxing poetic here for a minute. As I watched that first bent rising into the air, I was surprised at the tears which sprung to my eyes. Oddly, it struck me as the identical feeling I had way back when we first began to clear the woods for our house, when J. started in with the chainsaw and the first tree shivered, cracked, and fell. It seemed appropriate that as those trees rose again, transformed, the same emotion would greet me.

That’s done. Now let me proceed with a slideshow. So many were there with their cameras, so I’ll let them tell the rest of the story with images.

20170930_105633
Getting to know the roustabout. First bent on its way up.
SONY DSC
Last of the four! Each post is stabilized by screwing in a temporary 8′ board and 2 diagonals, giving it a giant foot so it can stand on its own, and still be moved around.
SONY DSC
The hieroglyphs that helped us reconstruct each bent and knee brace like a puzzle.
SONY DSC
Each bent is then connected by a pair of wall plates with their corresponding diagonal knee braces.
20170930_144731
A good shot of the four bents connected by the wall plates. Each wall plate is two pieces, joined in the middle with four pegs, most visible in the far wall plate. This was what J. was especially nervous about: will the pieces of the wall plate meet once they’re up? Turns out, NO PROBLEM! On the near wall plate you can see the “bird’s mouths,” the notches where the rafters will sit.
20170930_141550
Evidence of a summer’s worth of work, J.’s joints fit nearly perfectly. He was surprised, but no one else was.
20170930_125131
Lunchtime! Chili around the fire.
SONY DSC
Now the first rafters go up. Their ends sit in the “bird’s mouths,” meeting at the peak in a mortise and tenon, which will later be pegged.

20170930_152431

SONY DSC
Inside. Decidedly church-like.
20170930_160006
The day’s work is done!
SONY DSC
The happy workers. (Not pictured: all the folks who worked on the food, took pictures, handed up tools, and yelled snide bits of advice from the ground. Too modest to get in the picture.) The branch in J.’s hand will be pinned to the peak of the house–it’s a timber-frame tradition meant as a thanksgiving to the living tree.
SONY DSC
Basking in the glow of a job well done.

J. and I are not that great at community generally. We’d usually rather stick to our introverted ways and rely on ourselves than ask for help. But this experience was enough to make us rethink that tendency. In fact I’ve even caught myself thinking that every house should be built this way, touched by the hands of friends, blessed by their toil, surrounded by the community that surrounds us.

The next day as we unpacked the joy of the previous day, J. likened it to his experience of childbirth. For months he had grown this thing (outside his body) and in one long day, preceded by fear, anticipation, and anxiety, the thing came into the world, surrounded by joy and love. As the resident child-bearer in the household, I can’t say this analogy occurred to me, but J. did, in fact, nail it.

And finally, a big thank you to all who came to help. We would never have done it without you, and we wouldn’t have wanted to.

P.S. If you want to see some video of our house-raising (which this website doesn’t support), and you’re hooked up to the thing called Instagram, I posted a few on my account: the.clay.life.

How Not to Build a Floor

September, 2017

The posts and the rafters are cut, the pies are made, everything is ready to raise the house…except the floor. Our working surface all summer has been a sheet of plywood over the substantial beams of the foundation. But since this is Wisconsin and we don’t want our feet to freeze to the floor in the winter, we’ll need some insulation underfoot.

It may seem odd to not have a traditional solid concrete foundation under our house, to build our house over open air, but let me remind you this is a hand-built house. For one thing, we couldn’t have gotten a cement truck up the hill to pour a foundation, even if we wanted it. And since we have a host of neighbors (skunks, ants, snakes, raccoons, mice, and all their friends and relations), who own our woods and are looking to move back in wherever it looks nice and cozy, we wanted make the space below our house less hospitable by leaving it open to airflow. Hence the need for insulation.

So we began by building a box on top of that original sheet of plywood, a box filled with joists.

20170903_174948 (1)

Throughout this process we chose to slide the posts and beams of the house back and forth from end to end of the platform. It seems redundant to take them off the platform when they’ll need to be back up there in a few days to be raised. Above, we begin work on the east end of the platform, so the timbers are on the west end, and below, as we work toward the west to finish the joists, the timbers are slid all the way to the east end.

20170911_095109

Once the joists were built, we filled their cavities with insulation. We’ve chosen perlite as our floor insulation, that white styrofoamy stuff you find in potting soil. It’s actually rock popcorn: a kind of rock which, when heated, expands like popcorn into an airy, insulative particle. The bonus of perlite is that it resists mold and isn’t attractive to mice or insects (here again, we’re looking to keep our neighbors away).

20170911_120854
Not an early September snowstorm, just perlite.

We looked for a super calm day for this job, since the stuff blows around like dandelion fluff. We poured it out of giant bags into the cavities between the joists, screed it flat, and screwed down sheets of plywood as we go.

And then the rain clouds started to gather…

Here is where we began to wonder if it was indeed wise to build an insulated, finished floor without a roof to keep it dry. The thought began to tickle just a little bit in the back of our minds, but we shrugged and kept going according to plan.

It’s not that the perlite melts or rots in the rain, but it seems to behave like thousands of tiny sponges. We’re not sure we want to live in such close proximity to a thousand tiny wet sponges.

We caulked the seams of the top layer of plywood and painted it with latex paint to help make it water resistant. (Here I died just a little. I had sworn I wouldn’t touch a single surface of this beautiful house with latex paint. Ah well, priorities, priorities…) We laid down a layer of tar-paper, tarped it with holey tarps, and crossed our fingers as the drops started to fall.

On a dry day we pulled off the tarps and got to work laying down the finished floor. This is beautiful stuff: 6″ oak rough-sawn boards J. picked from a pile at the local sawmill and had milled into 5″ wide tongue-and-groove planks. They’re still rough-cut on the top surface so we can sand and finish it later. We’re a little in love with the weathered surfaces, even though we know they’ll be sanded away.20170918_102300

And then it began to rain again.

We tarped the floor again and came back after the rain to find rust streaks in our flooring from the wet nails. J. went to the store and bought out the plastic sheeting. He laid it down in great strips and duct taped the seams. It began to rain nearly every night and every time we rolled back the sheets of plastic we found wet wood beneath.

Still, we learned some tricks to keep it on the dry side, and kept on laying down the wood.

20170921_131648

20170924_161504

Finally it was done (notice the tarps rolled back over the timbers). We left the corner by the stairs, which will be a tiled entryway. J. painted the floor with linseed oil to protect it from the rain, let that dry, and put the tarps over again. Because it would rain again that night.

Do I sound tense? That’s only because it feels like nature has been just the teeniest bit against us. Whenever J. has been available to work on the house it’s been either raining or a decidedly un-September-like 90 degrees, and the date of our house raising is fast approaching. We’ve been checking the forecast like it’s a newborn baby.

Also, J. is pacing the floor as I write this, rehearsing what needs to get done before the timbers go up and how exactly to do it. We’re both are such intuitive folks, approaching all our work (art, building, child-rearing, life decisions…) as if we’re feeling our way through a dark room, touching as we go, responding to what touches our fingertips and doing what seems best. This becomes hard when 30 of your dearest friends are looking at you, waiting for instructions as they lift the beams of your house over their heads.

At least that day it’s not supposed to rain.

Notching the Ceiling Joists (and Finishing the Frame!)

September, 2017

Before we move on to talking about ceiling joists, I wanted to get in a few more images of the posts and tie beams. They’re way more poetic than ceiling joists.

20170801_135056

20170805_094939 (1)

20170818_163303
Here they all are, cut and ready to be reassembled. It’s been pretty rainy, hence all the tarps.
20170804_163017
J.’s dad, who’s been helping with the chiseling, agrees with me about the poetry of the beams.

On to those ceiling joists. I guess I’m not as excited about them because they didn’t come from our woods. We bought them from the local mill and then borrowed a tractor to haul them up the hill. Milling is important because they needed to be straight enough to hold up a metal roof, and J. won’t let me thatch the roof. Maybe he would if I knew how.

But back to those joists. They are beautiful, as milled lumber goes: rough cut 4 x 6 Douglas Fir. Pink as a baby’s bottom. J. cut tongues into half of them and forks into the other half (I’m sure these are the correct terms) so that along the roof-ridge the joists will meet with a mortise and tenon joint. Here they are, forks on the left, tongues on the right:

The other ends of the joists will rest on the wall plate, and a simple groove was cut into their ends to fit into the wall plate.

20170828_135228
I like the visual metaphor of this image. Notice J. has exchanged his Amish hat for the chainsaw helmet as he uses a circular saw to cut those grooves.

Lastly, each wall plate needed a notch to receive the joists. This cut is called a bird’s mouth. Hopefully you can see why from the pictures. It seems like a complicated cut, but it flies pretty fast (no pun intended) with the help of a mal or pattern guide, which you can also see in the pictures.

20170818_141249.jpg

20170818_141232 (1)
Here you can see the south half of the wall plates getting their bird’s mouths. Their northern mates are under the tarp, and the pile of posts. Eventually, each north beam and south beam will be joined at the angle cut to make one continuous beam running the length of the house.
20170828_143605
I just wanted to show proof that I did also work on this house. Here I am banging out the notch that will fit into the bird’s mouth, working so fast the camera can’t keep up with me.

Here let’s take another break so show what others in the household have been up to:

Also, a couple of the creatures that have been hanging out with us:

And that’s it! The frame is cut and done! We do have another big step before we start calling you all for help raising the house (that’ll be the next blog post), but you might want to start checking your voicemail!

Or avoiding it…